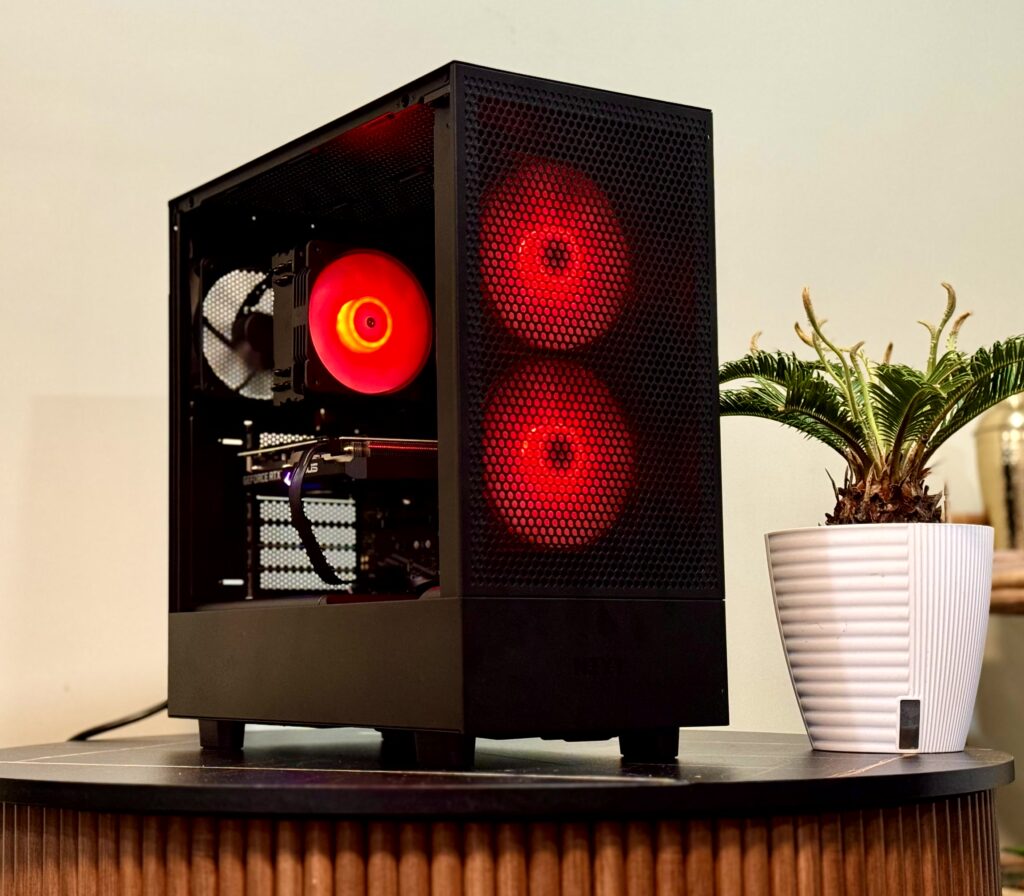
Red, Green, and Blue! If it has them, it makes your PC run faster! Just kidding but it does make your gaming PC look better! In this build I will share with you my process on building this 950$ PC. It is funny that we live in a world that a mobile phone (basically a PC) will cost more than a PC. Anyways that’s for another article. Let’s start building!
Materials
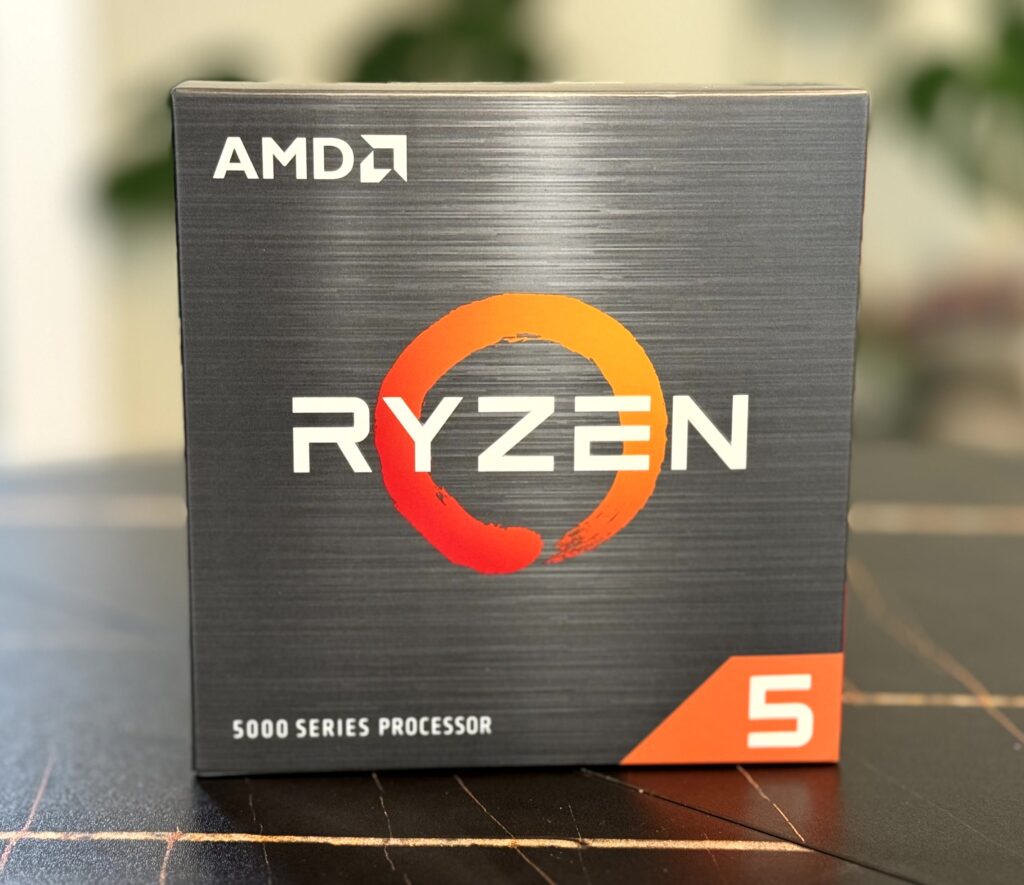
CPU – AMD Ryzen 5 5600 3.5 GHz 6-Core Processor $114.83
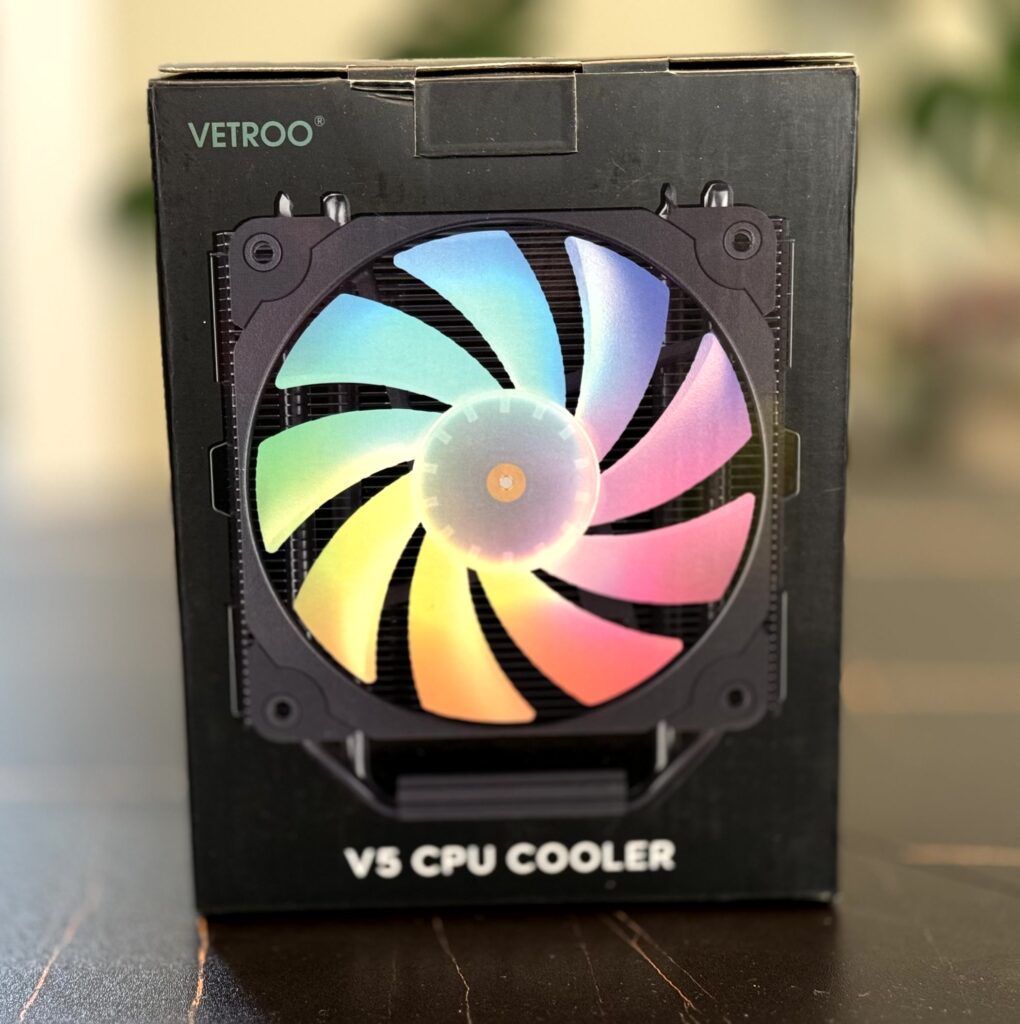
CPU Cooler – Vetroo V5 52 CFM CPU Cooler $27.99
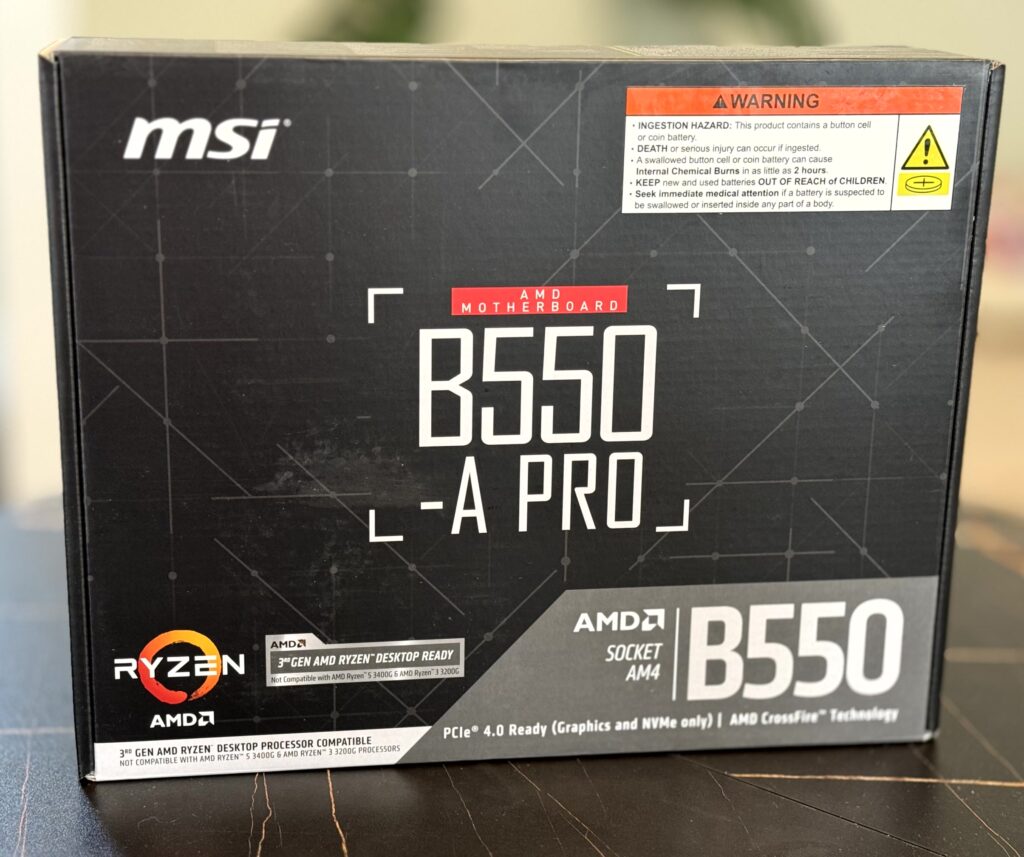
Motherboard – MSI B550-A PRO ATX AM4 Motherboard $109.99
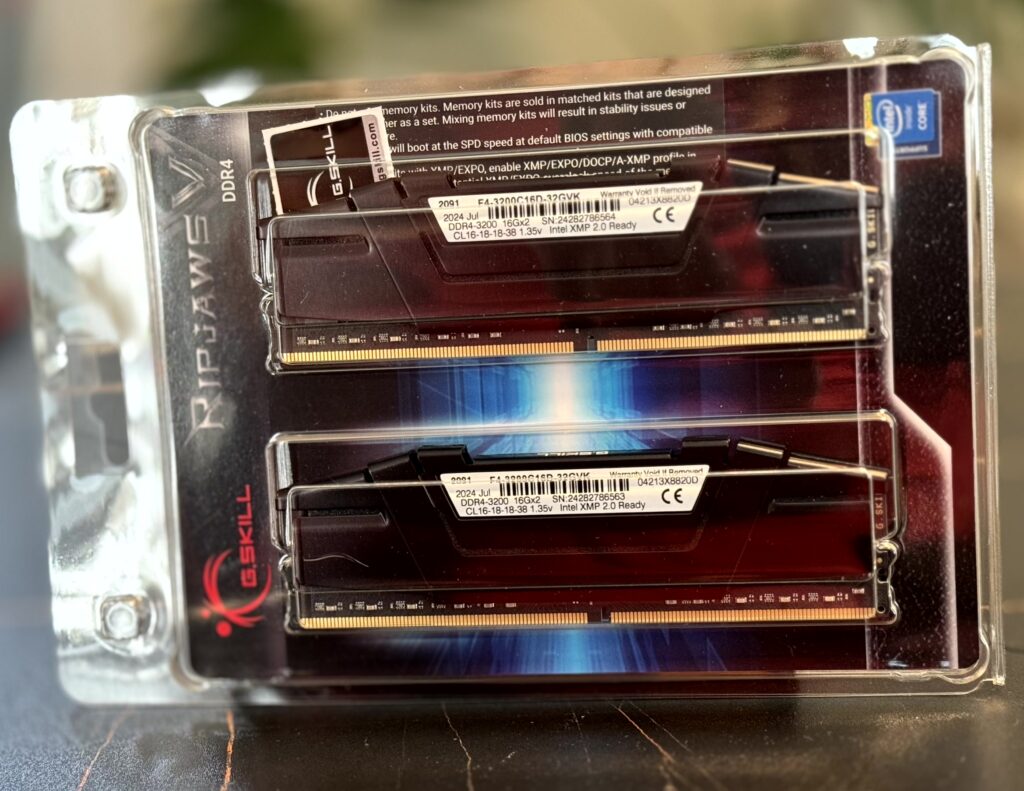
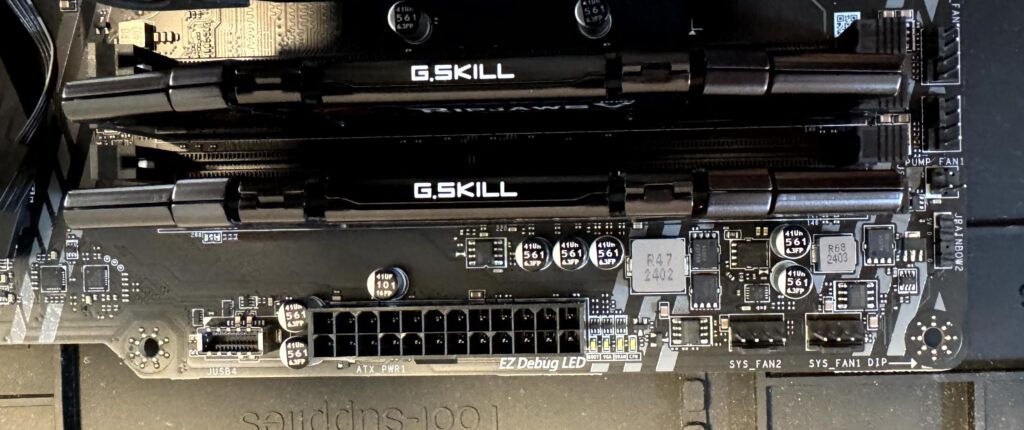
Memory – G.Skill Ripjaws V 32 GB (2 x 16 GB) DDR4-3200 CL16 Memory $53.99
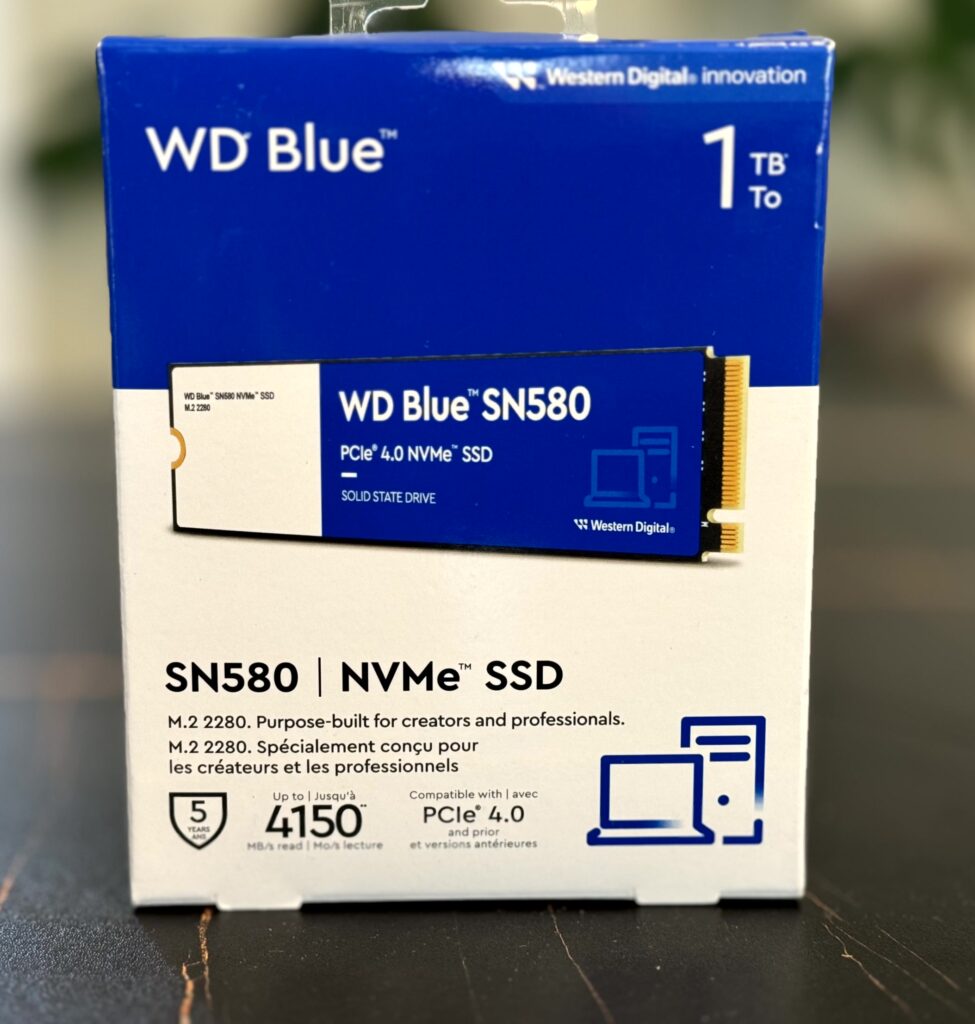
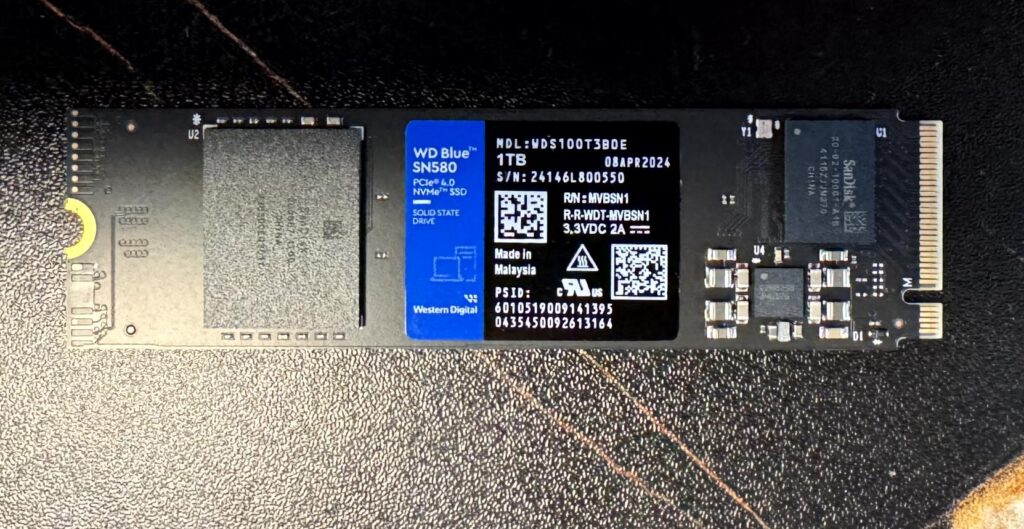
Storage – Western Digital Blue SN580 1 TB M.2-2280 PCIe 4.0 X4 NVME Solid State Drive $74.99
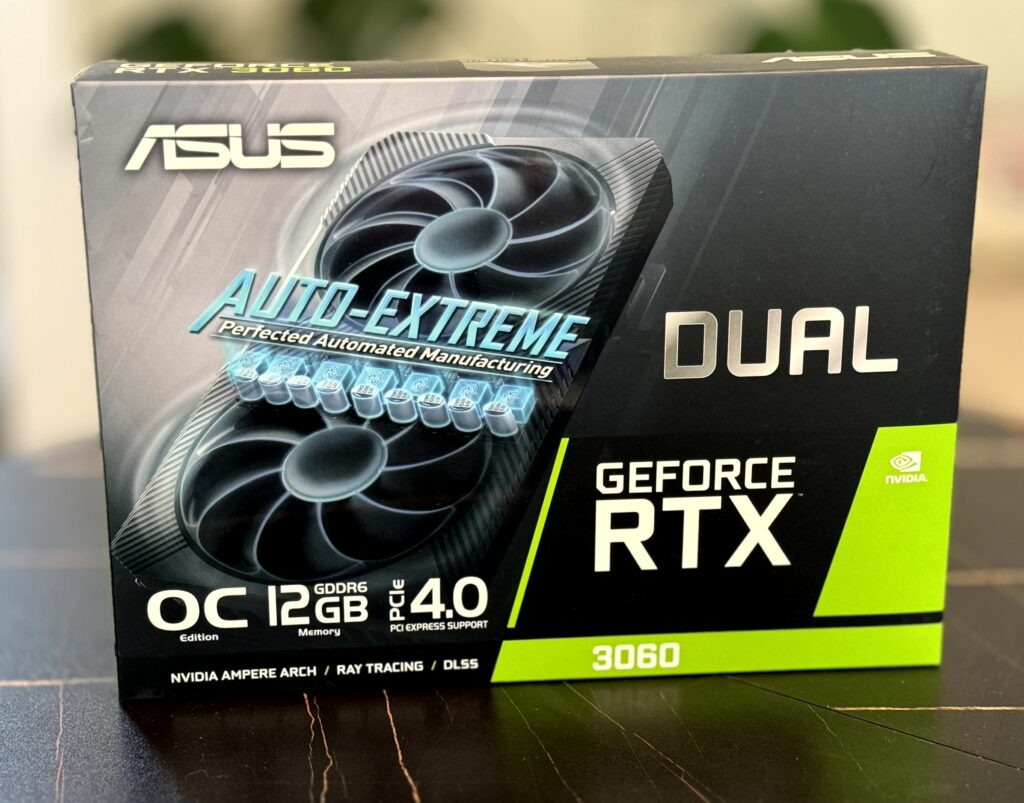
Video Card – Asus DUAL OC GeForce RTX 3060 12GB 12 GB Video Card $299.99
Case – NZXT H5 Flow RGB (2023) ATX Mid Tower Case $79.98
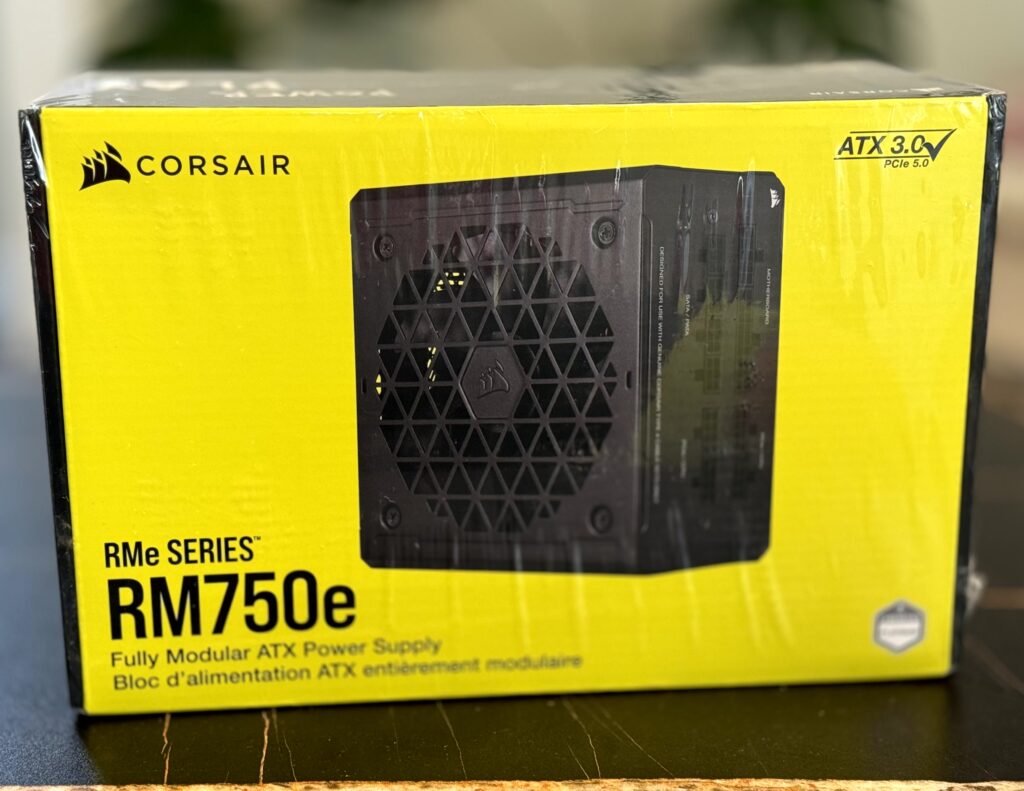
Power Supply – Corsair RM750e (2023) 750 W 80+ Gold Certified Fully Modular ATX Power Supply $99.99
Total $861.75 (without tax) $938.23 (Estimate with Tax)
Installing the CPU
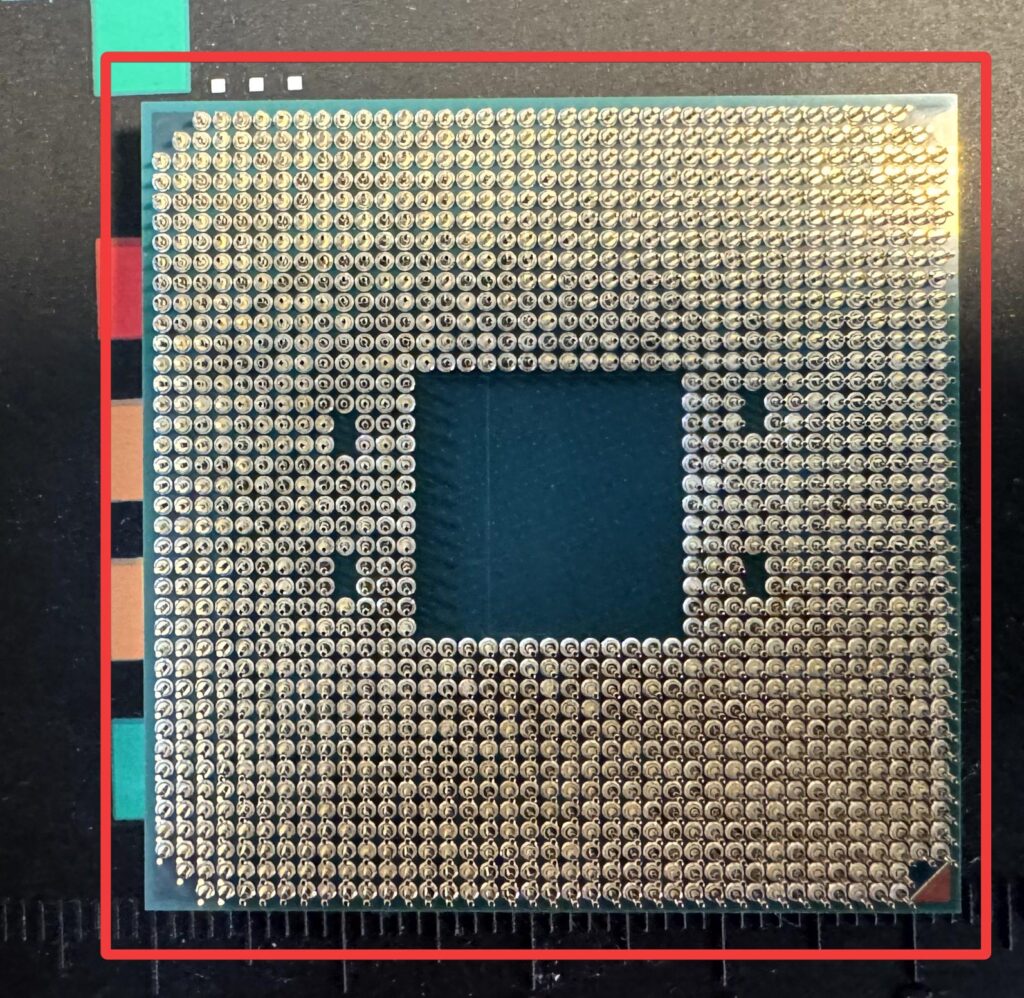
The brains of the PC! We want to carefully take our Ryzen 5600 from our package like it’s worth a million dollars! Take a moment and look at your CPU! If you look at the bottom of the CPU you will notice it has 100s of tiny pins. These pins will connect to the motherboard socket.
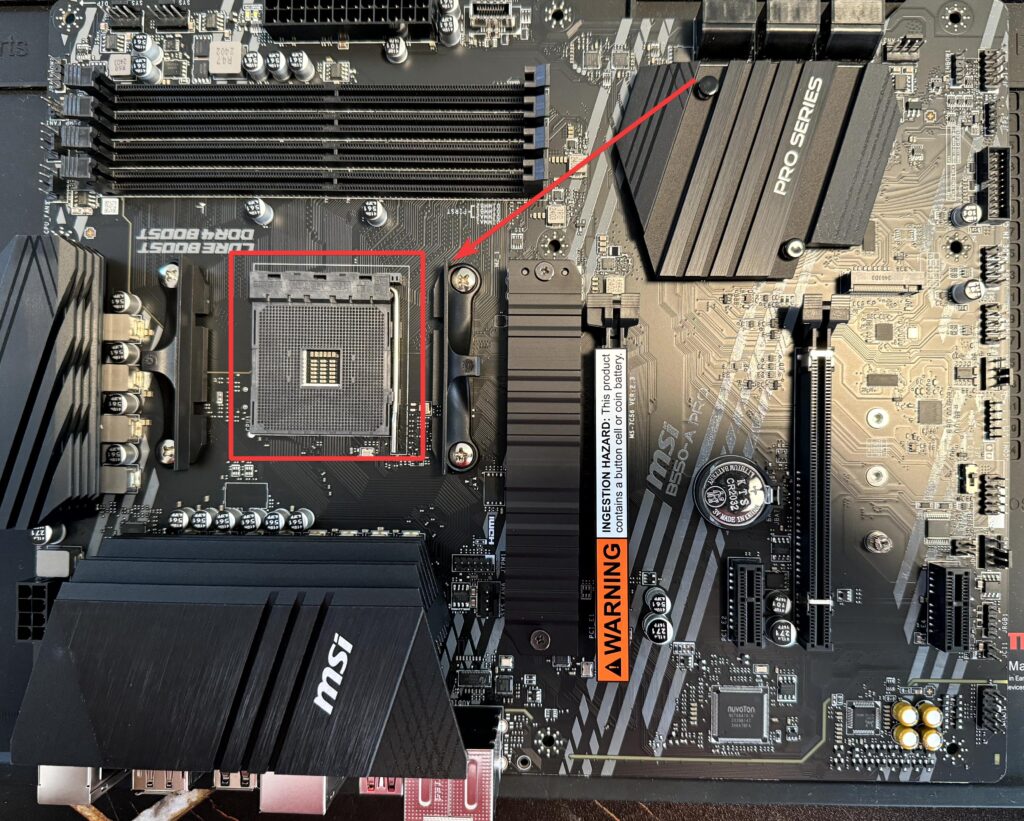
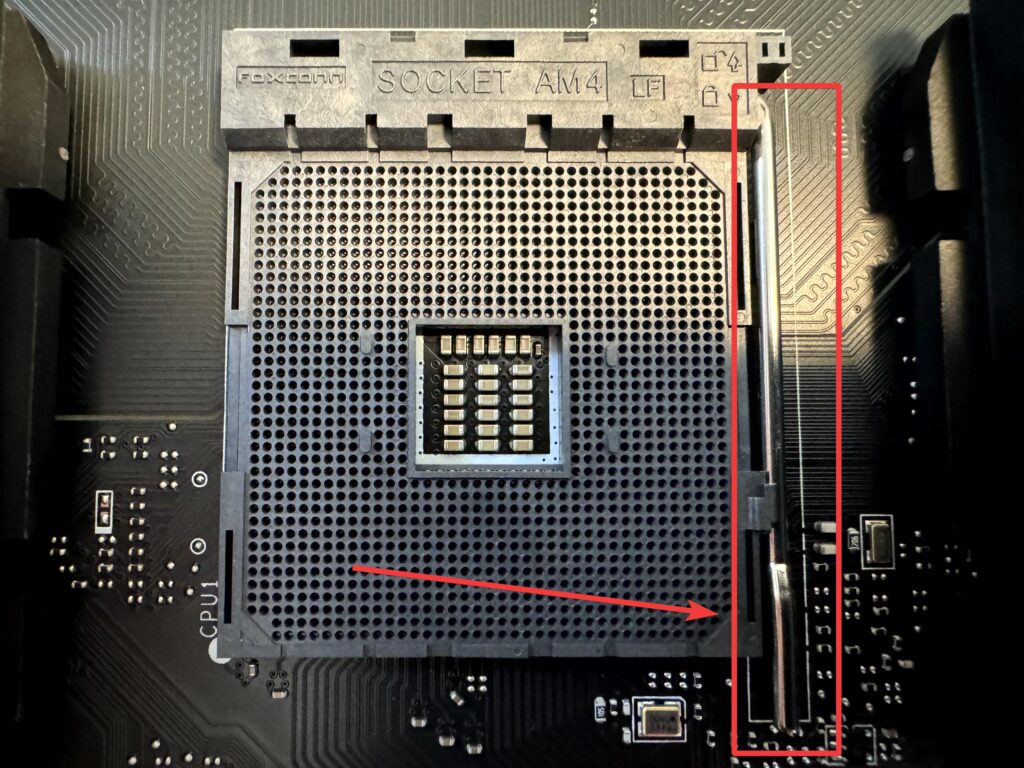
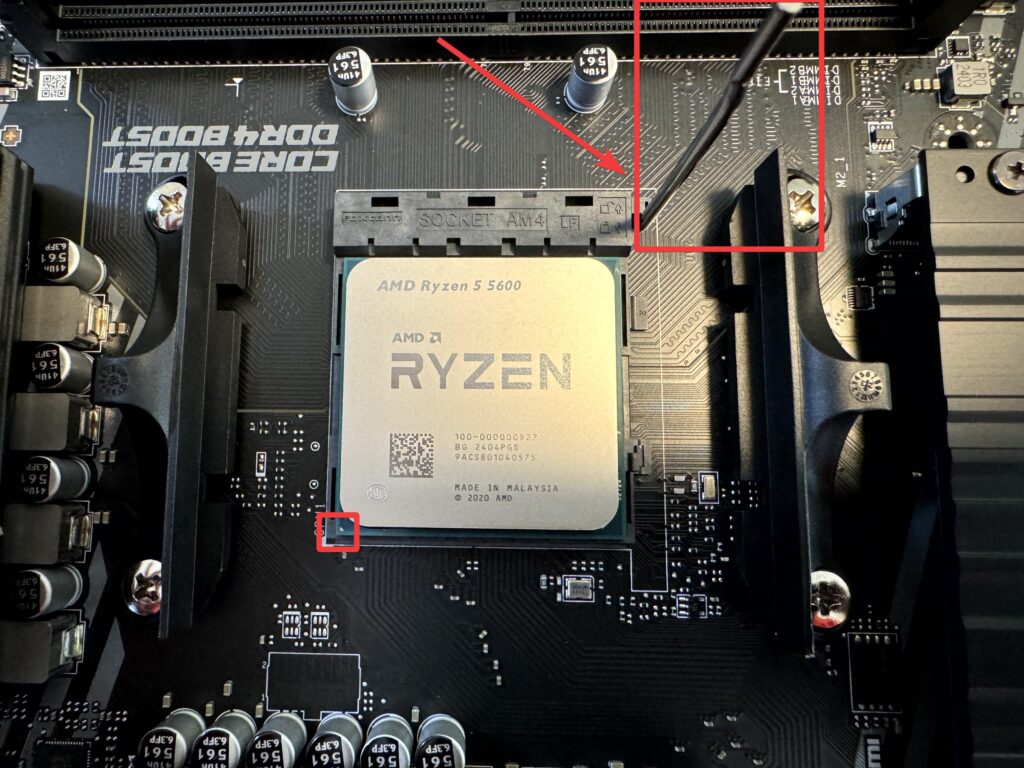
Step 1. Locate the motherboard CPU socket, open the socket by moving the latch.
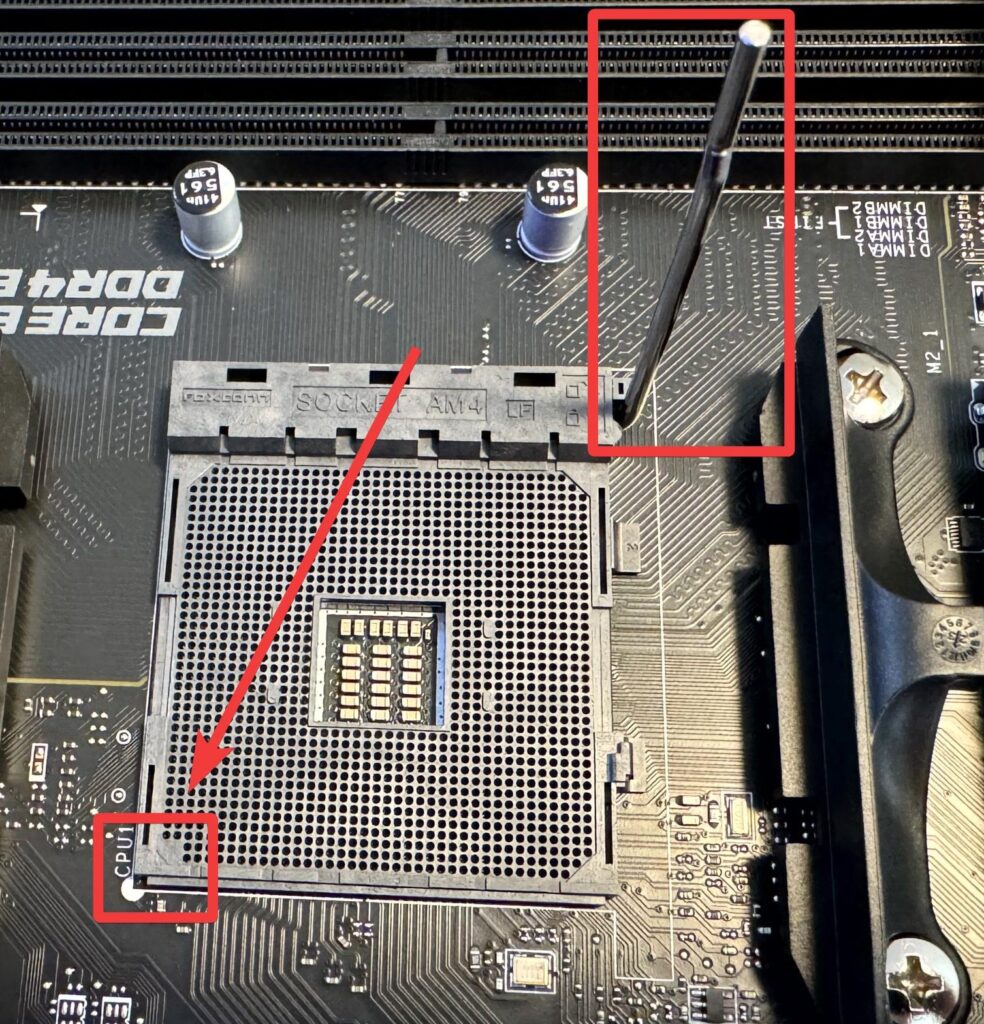
Step 2. Next make sure to find the tiny arrow that will help you set the CPU in the correct position. Match the arrow with the arrow on the motherboards socket. Place the CPU on the motherboard, it should gracefully fit in, like a tailored suit.
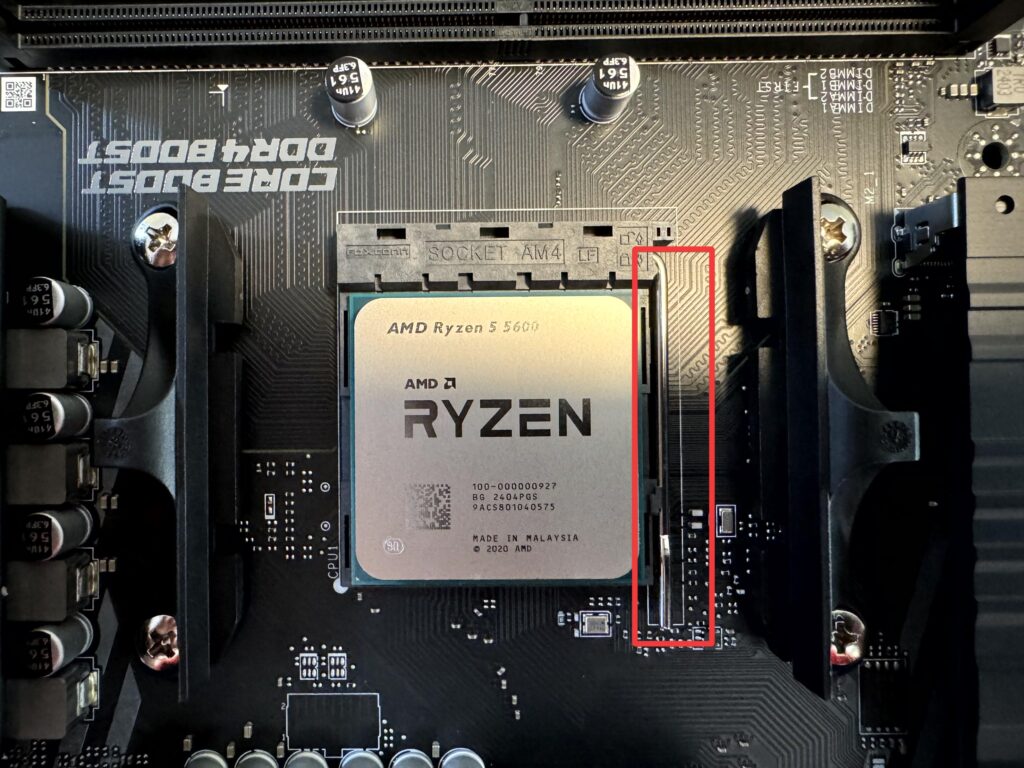
Step 3. Finally, once in, close the socket by moving the latch back to its original position. Don’t feel afraid to use a bit of force to lock it.
Mounting the Heatsink
Isn’t amazing when it’s over 100 degrees outside and you have no air conditioner? Its not. So what’s one way to keep you cool? By hugging a big ice block! (Highly unlikely you have a giant ice block). So in a similar way your CPU needs to be cooled somehow to prevent it from overheating. This is where our thermal paste and Vetro V5 52 CPU cooler comes to the rescue. In other words the CPU will transfer its heat to the heatsink. Heat sinks have a thermal conductor that carries heat away from the heat source. Thermal paste will help eliminate air gaps. When the heatsink gets installed it will spread that thermal paste.
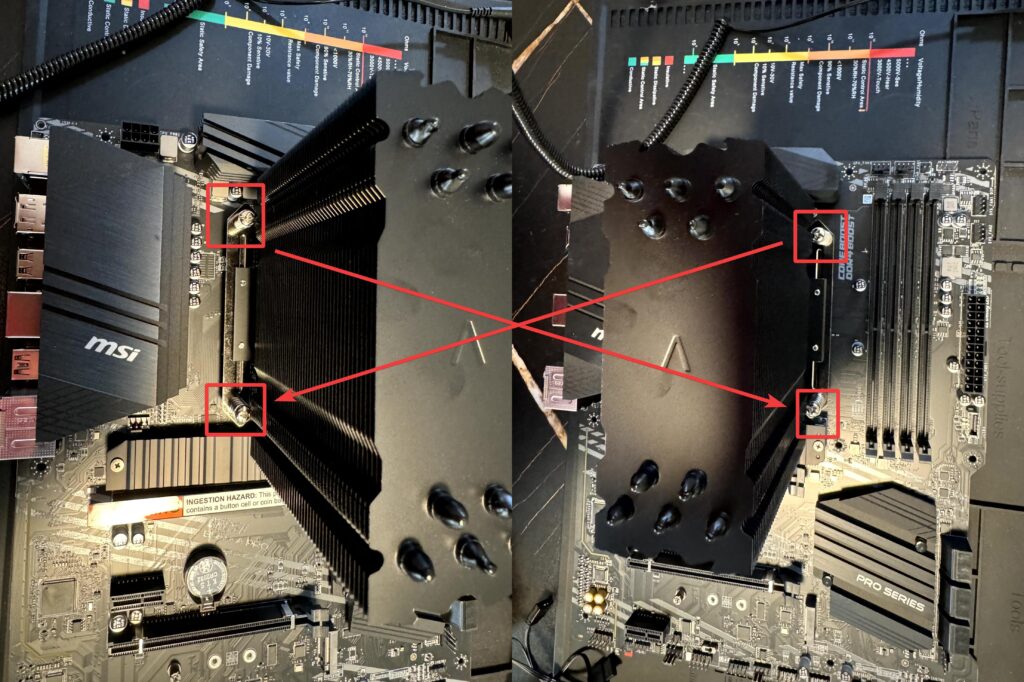
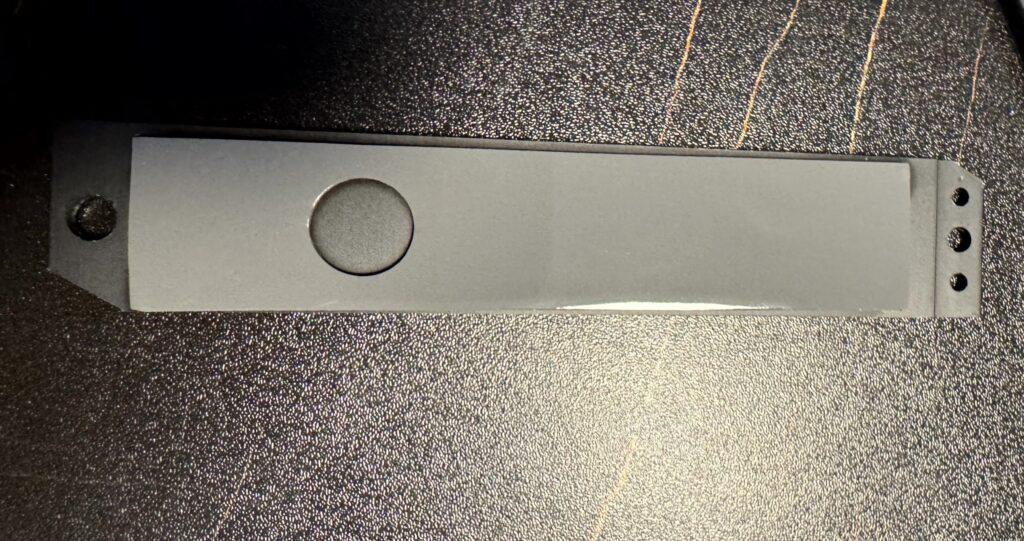
Step 1. First let’s remove the two brackets on the motherboard next to the CPU socket so we can have room to install the heatsink.

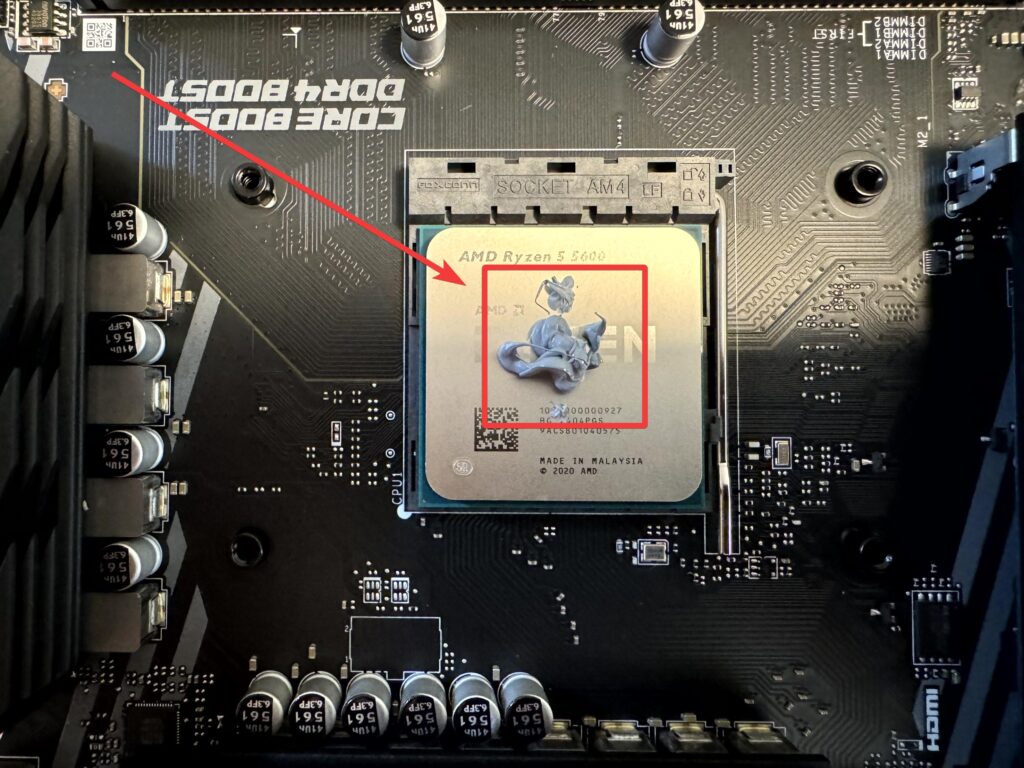
Step 2. Next place a perfect amount thermal paste directly on the CPU. We want to avoid to put too much or too little thermal paste. You can never go wrong by placing it directly on the center of the CPU.
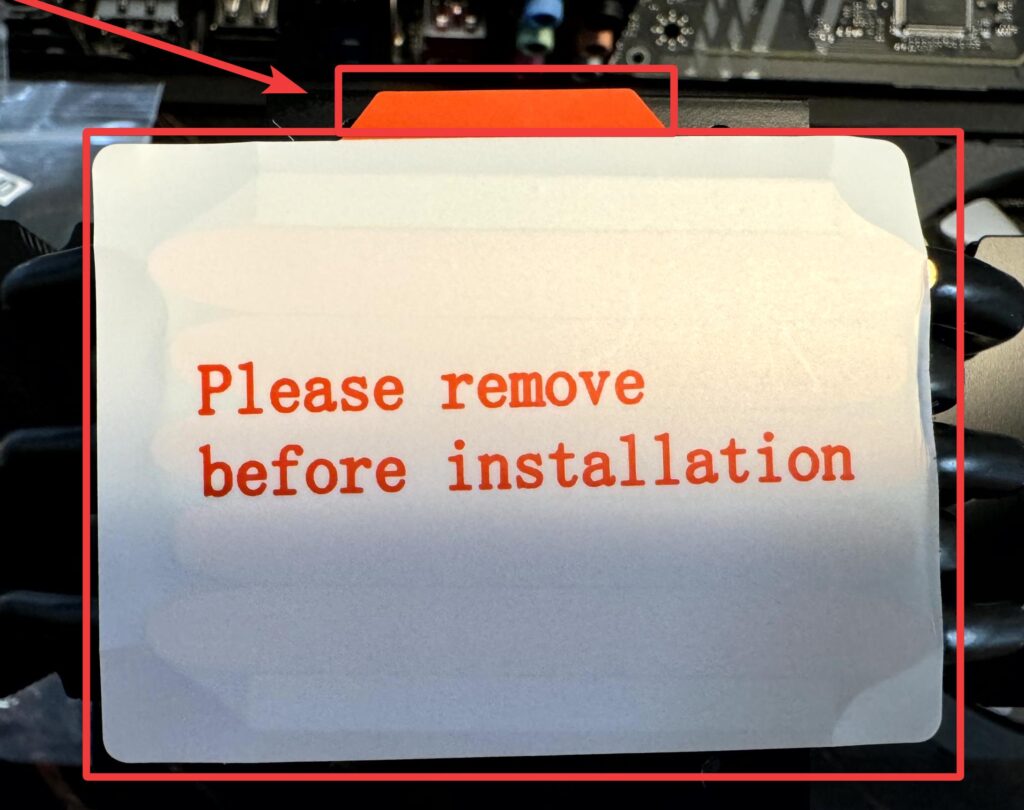
Step 3. Next we want to peel off that sneaky plastic label off the bottom of the heatsink. If we keep it on then the CPU won’t be able to transfer its heat and the plastic will melt.
Step 4. After that, attach the brackets that came with the CPU cooler. Make sure follow the directions from the manufacturer, each heatsink can differentiate in steps.
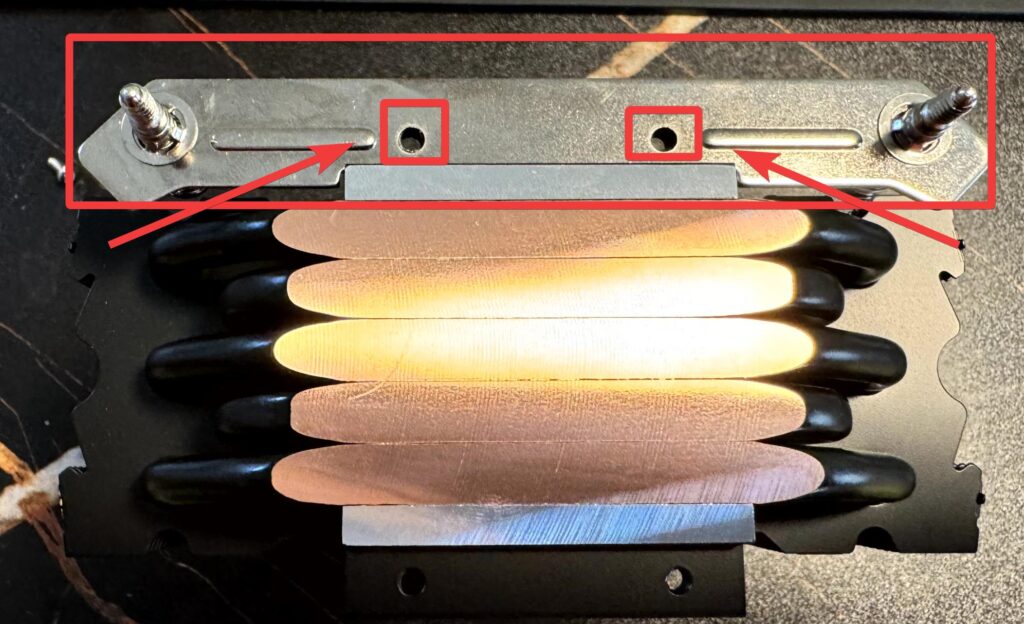
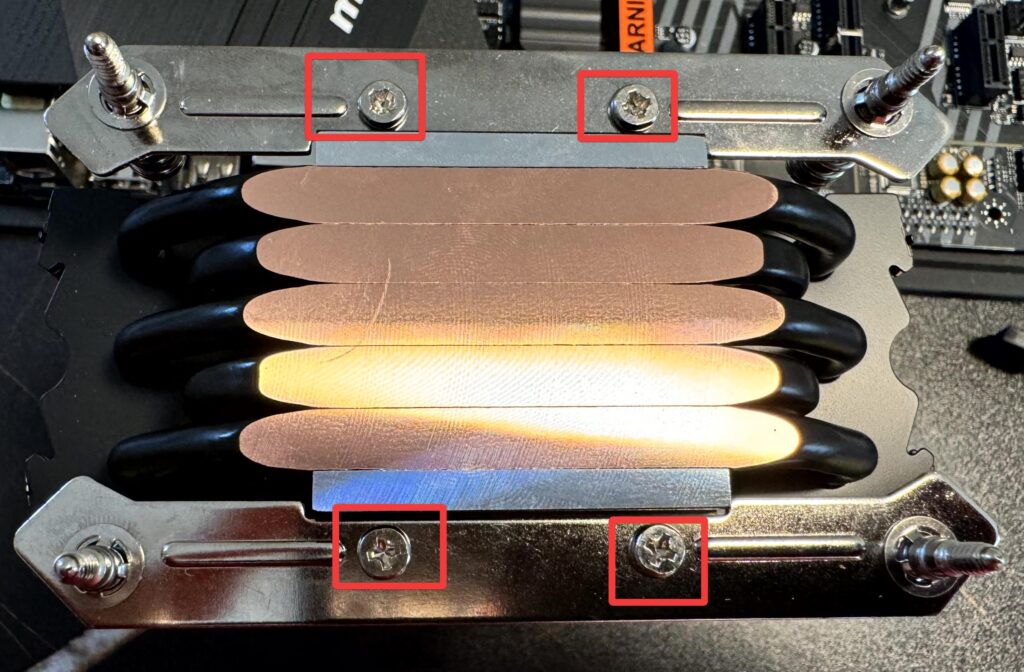
Step 5. After attaching the brackets, place the heatsink directly on top of the CPU. Next screw in the heatsink on the motherboard. Make sure to screw them diagonally.
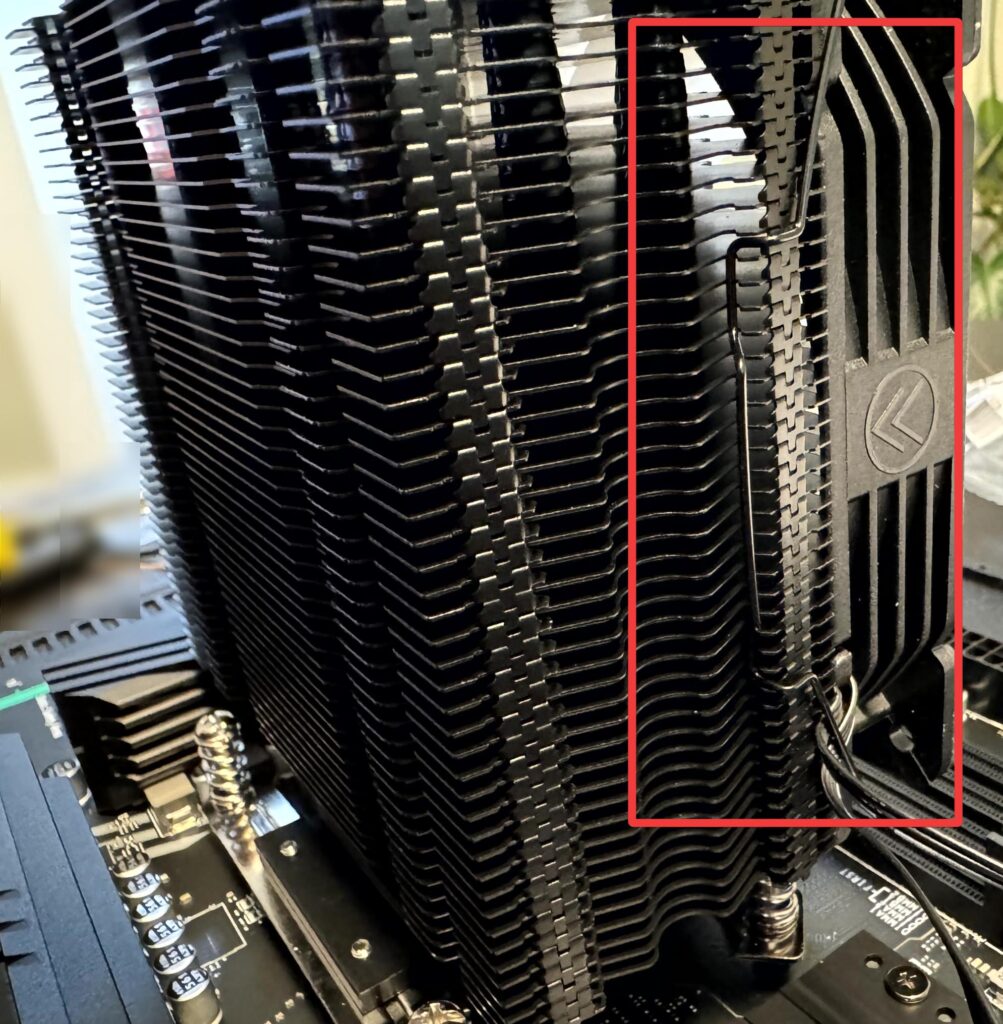
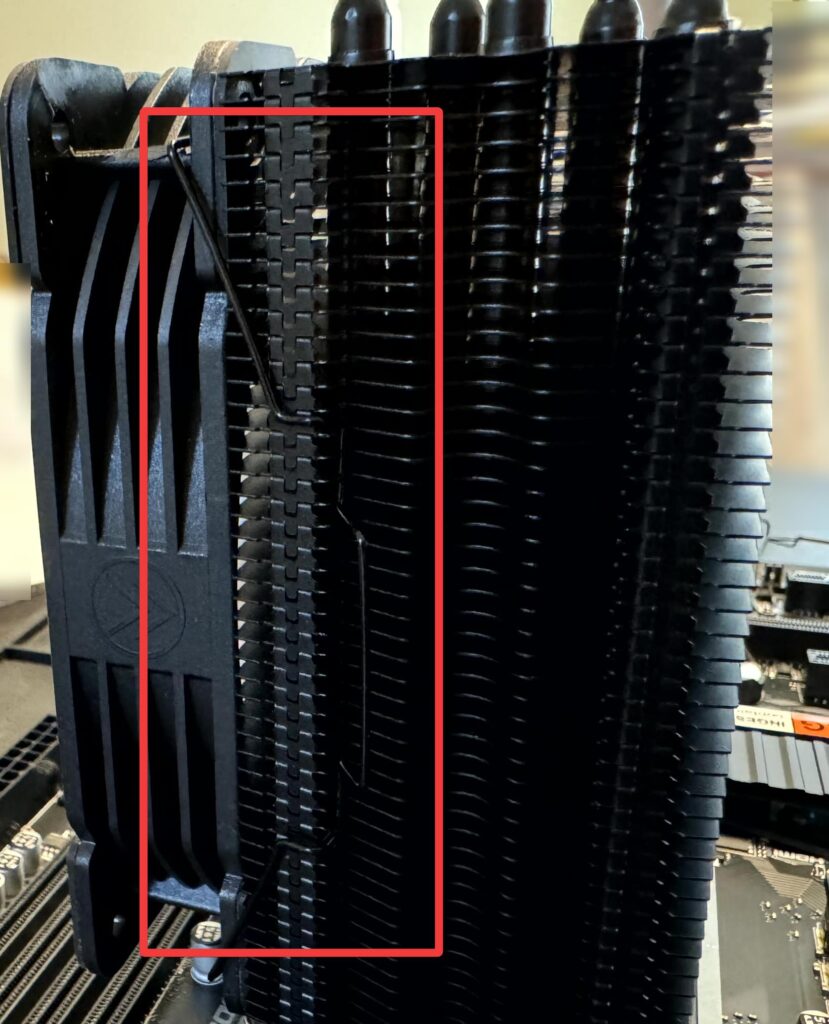
Step 6. Some heat sinks come with an attachable fan like this one. So let’s attach the latches on the inside holes of the fan.
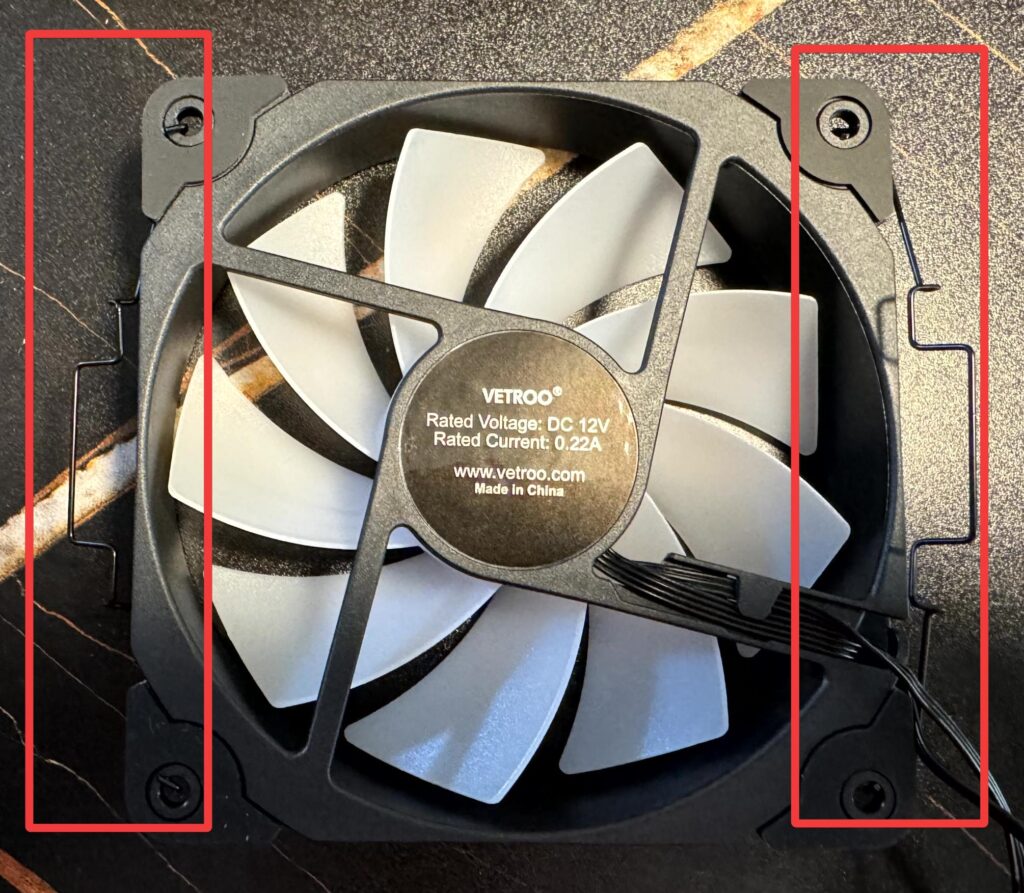
Step 7. Next attach the latches on the heatsink. Make sure to place the fan where you can easily plug in the cables into the motherboard.
Installing the Memory
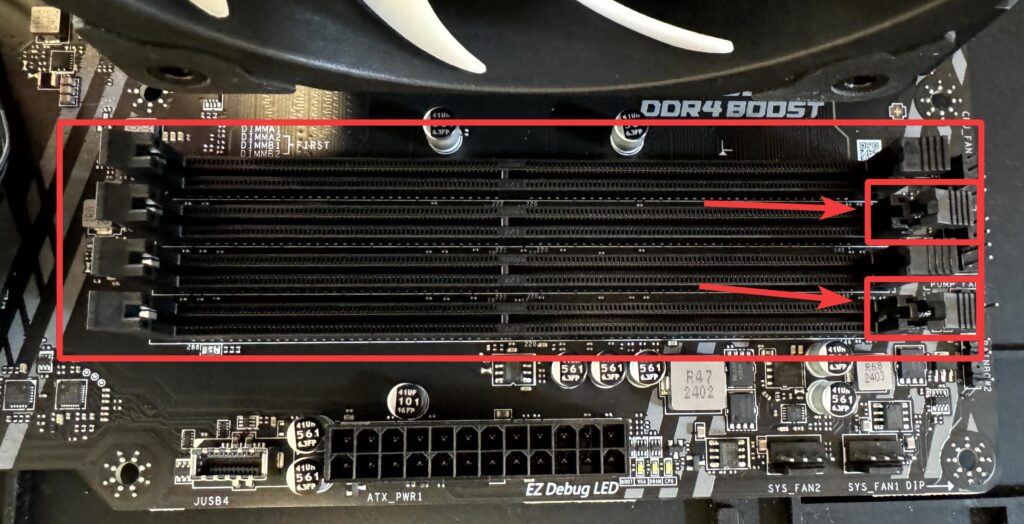
What is faster? Having to go to your garage to access your workbench or having to go to your workshop? Obviously it will be faster accessing the workbench in the garage because it’s near! In a similar way, the CPU uses RAM(Random Access Memory) to temporarily store data and access it. Keep in mind that RAM is volatile. Now I know it’s tempting to install the RAM next to each other but to take advantage of multi channel memory, they need to be installed in different memory channels. So if you install one stick on slot 1, make sure to install the second stick on slot 3.

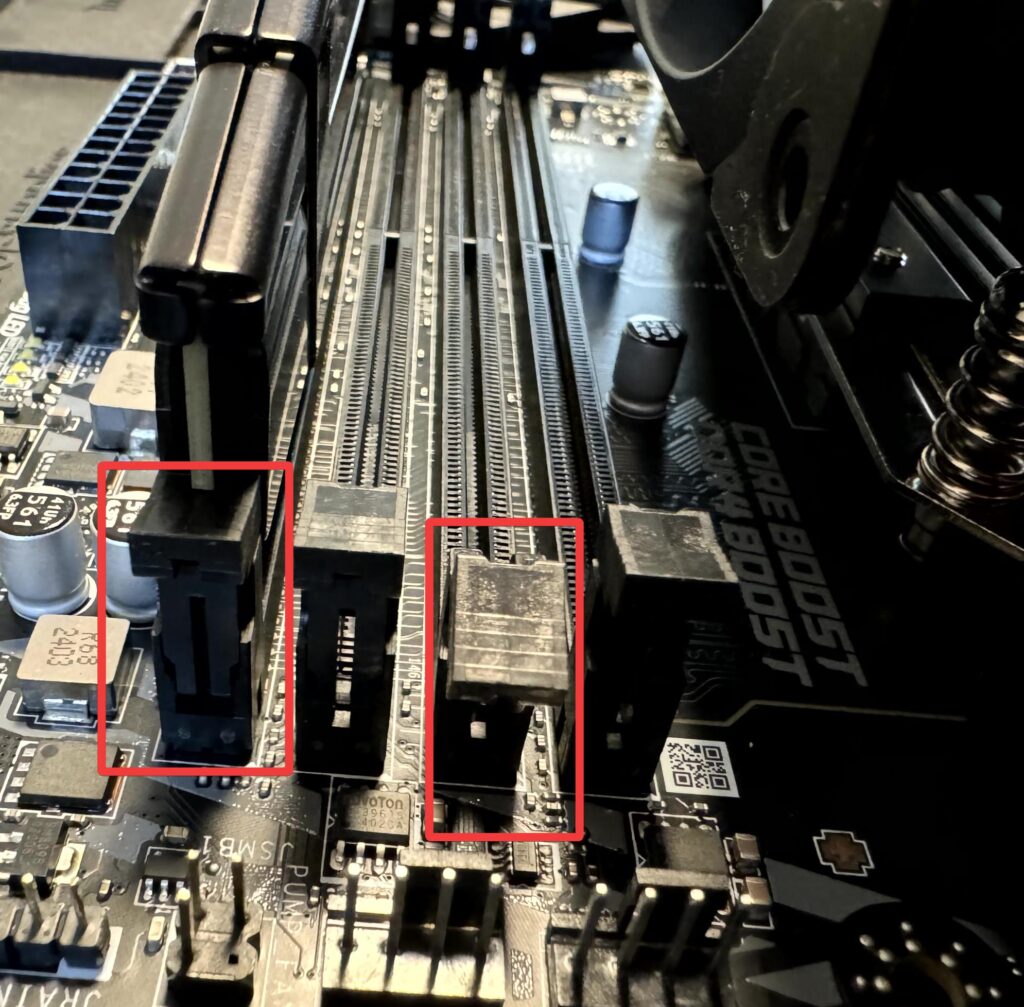
Step 1. Locate the RAM slots on your PC. Open the RAM holders on the slots you will be installing the RAM.
Step 2. Take notice of the RAM slot and there should be a notch that matches your RAM stick. When you install the RAM stick, it should make a click and the RAM holders will close. Don’t feel afraid to put a little bit of force to make it click!
Installing the Storage
Unlike RAM, storage on a PC will provide long-term data retention. Storages come either as a Hard Disk Drive or a Solid State Drive. The main difference is that Hard Disk Drive uses spinning magnetic platters to store data. However Solid State Drive uses flash memory. There are different types of form factors for an SSD. In our built we are using a M.2 form factor. This NVMe SSD is faster than a SATA SSD or HDD.
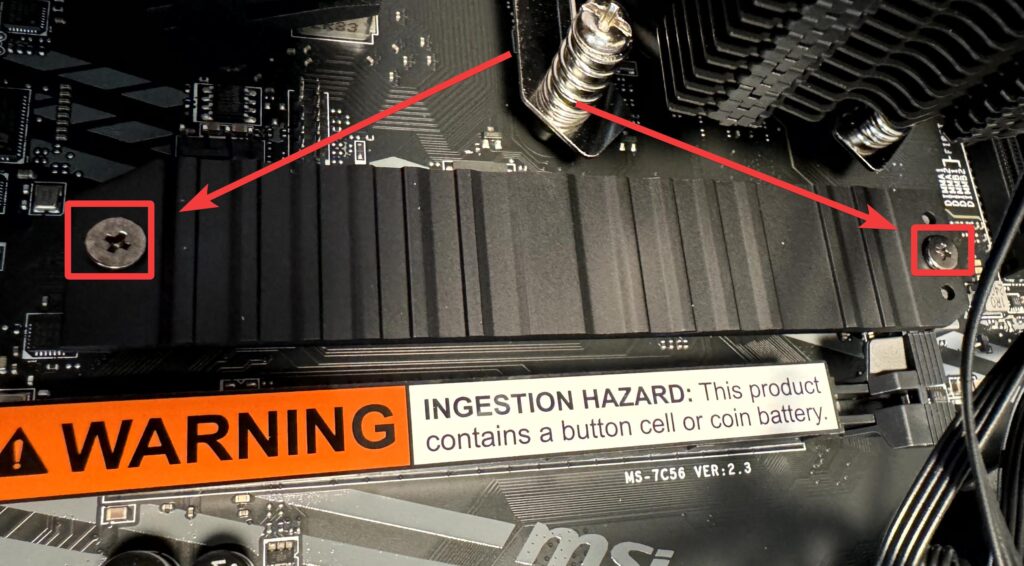
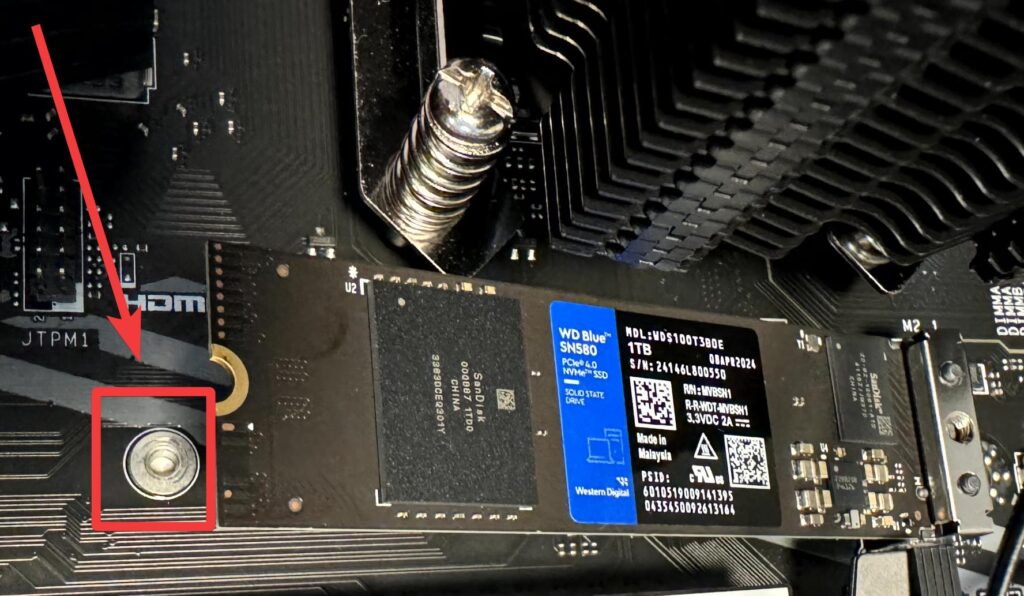
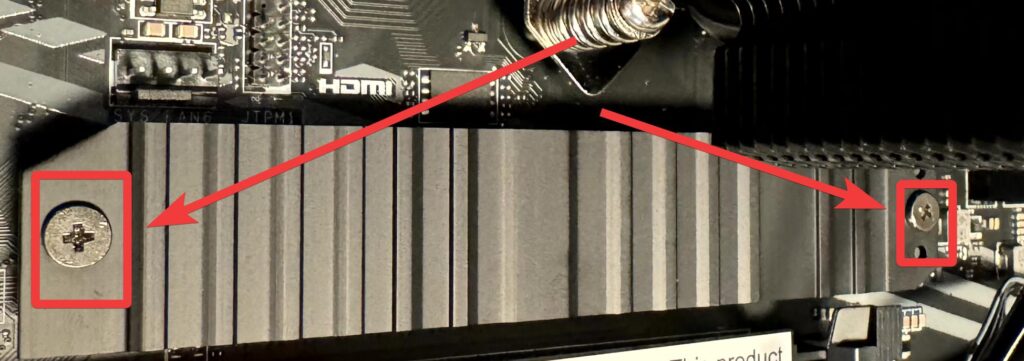
Step 1. In some motherboards, there is a thermal cover for your NVMe. First take the screw off of the thermal cover that is located near the heatsink.
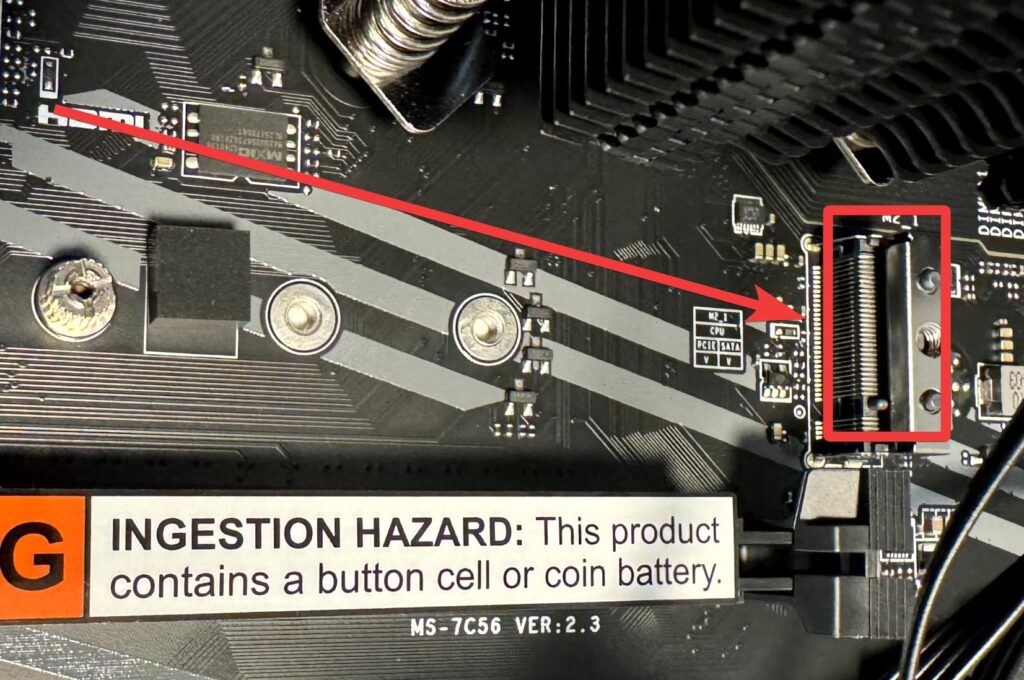
Step 2. After that grab your NVMe SSD and connect the end to the PCIe slot.
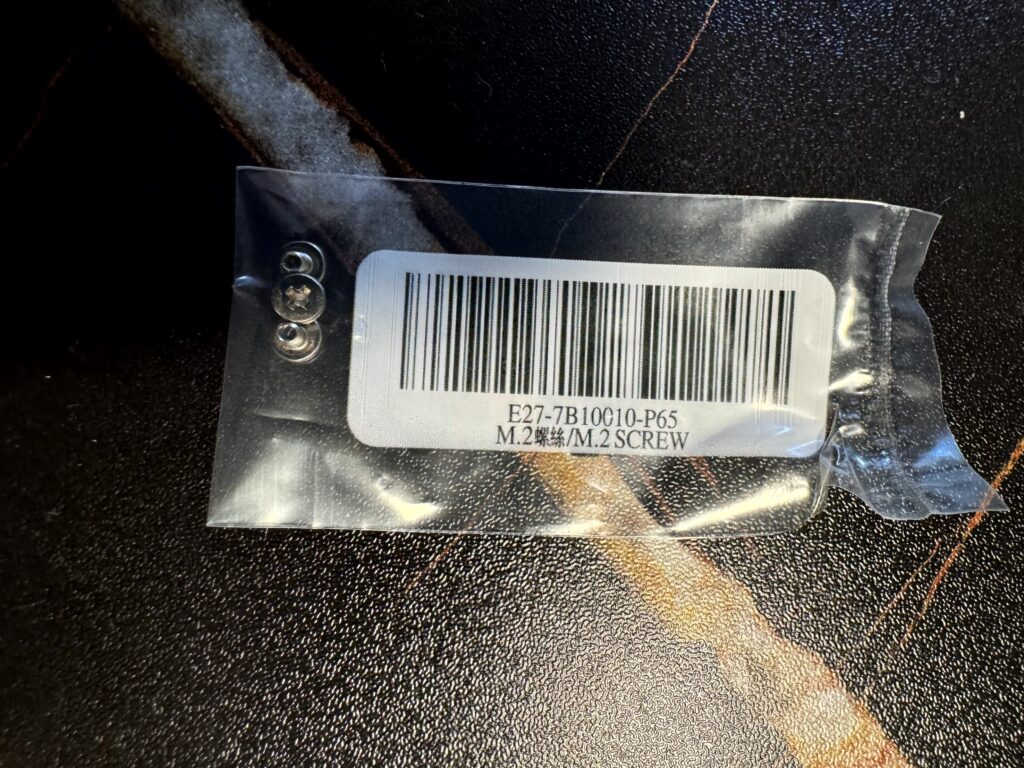
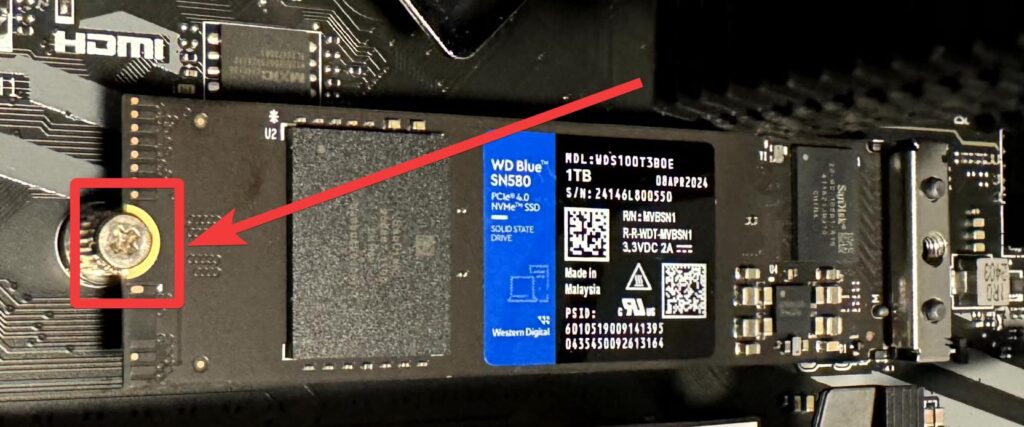
Step 3. Next use a M.2 screw to tighten the NVMe SSD.
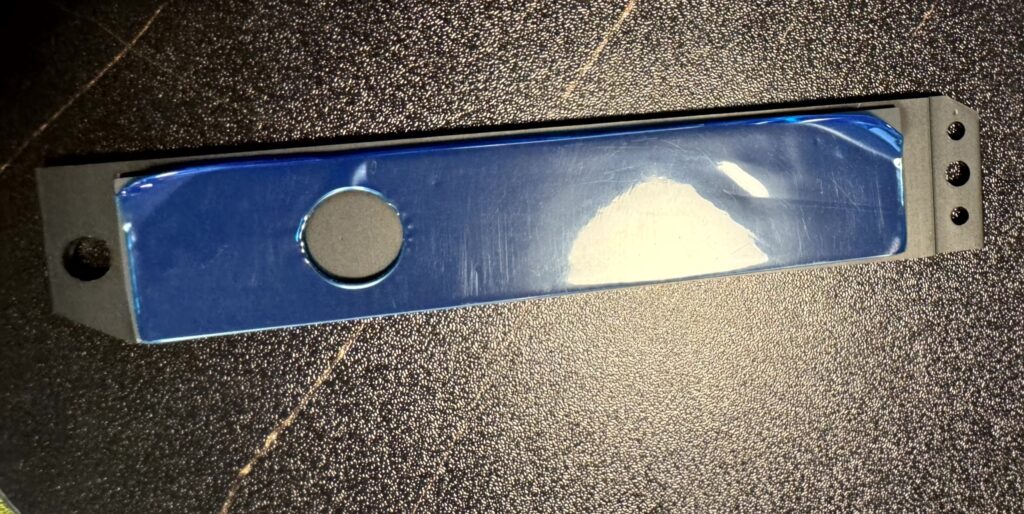
Step 4. Next strip the plastic under the thermal cover. Then put on the thermal cover back on. Make sure to screw it back on.
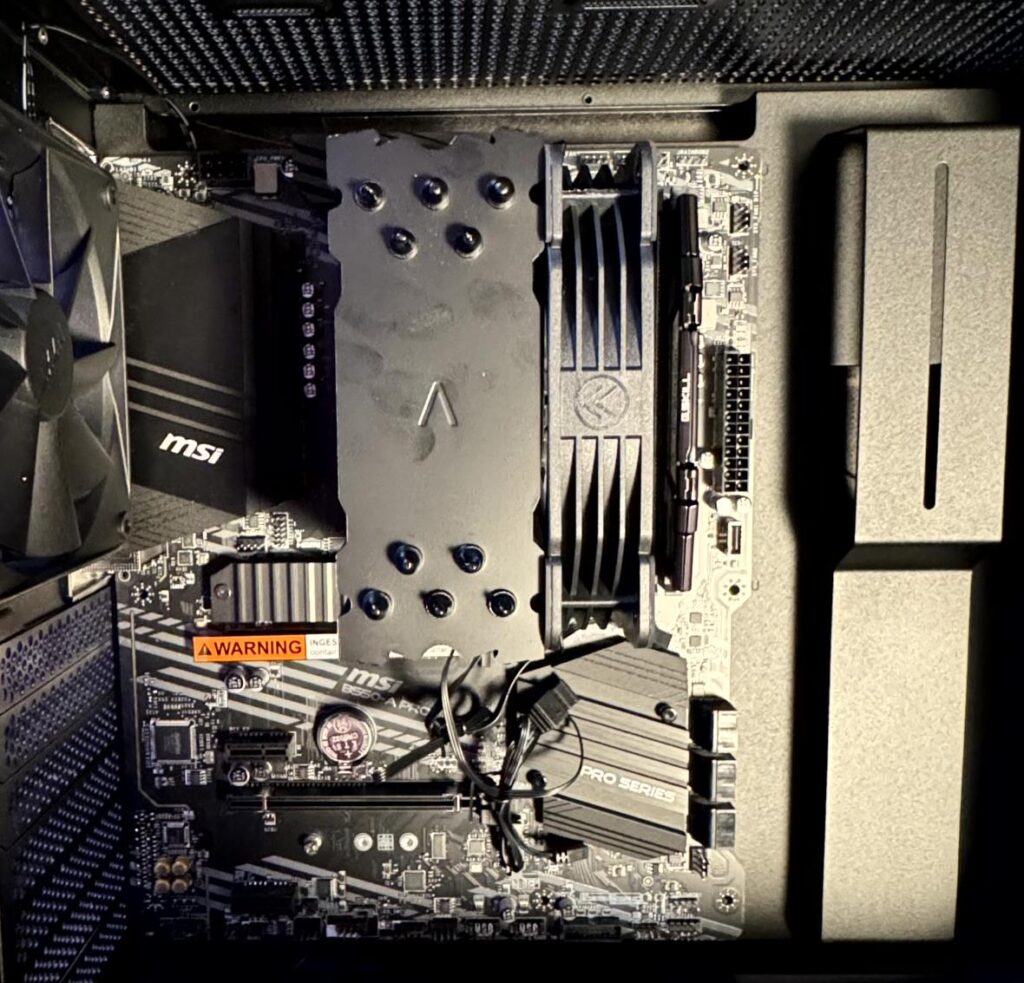
Mount the Motherboard on to Case
Lets give our precious motherboard a much needed home!
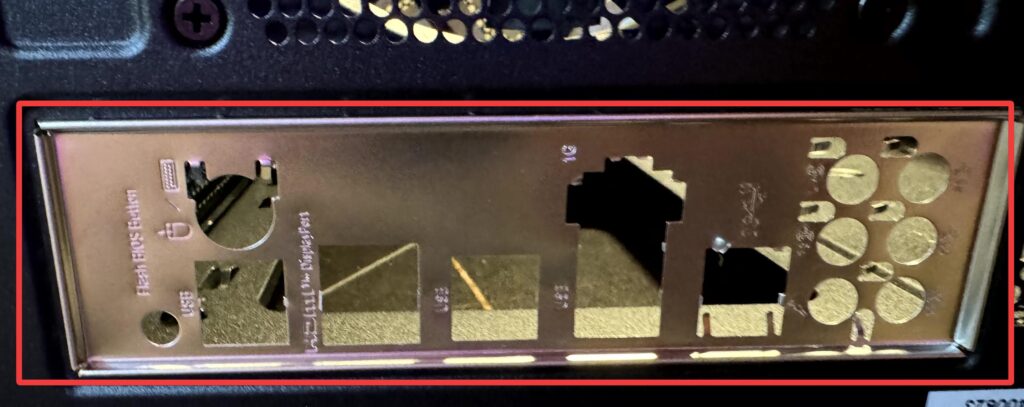
Step 1. First and foremost lets install our I/O shield to our case before we forget!
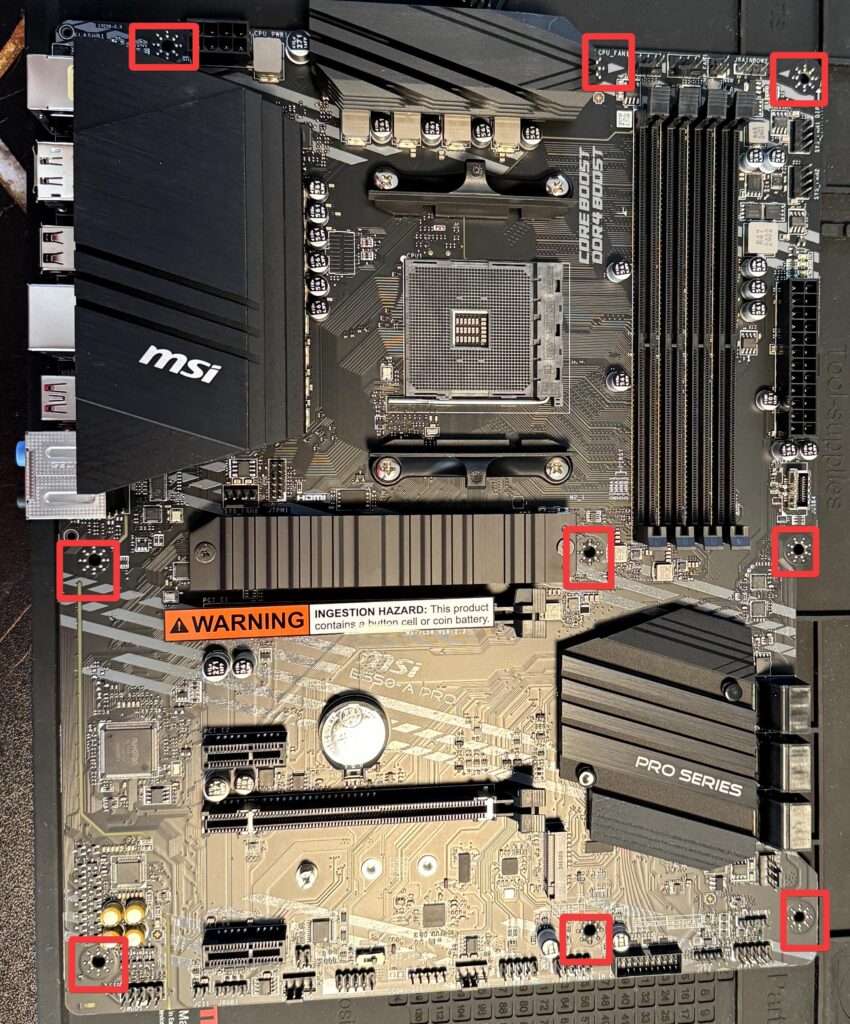
Step 2. As you open your case, notice that there might be already preinstalled standoffs. These standoffs will match the holes on your motherboard. Align the standoffs to the holes on the motherboard. There should be a standoff towards a middle that will fit into the hole which will help you align the motherboard. Next start putting screws on the motherboard. It will help to have the case laying on its back.

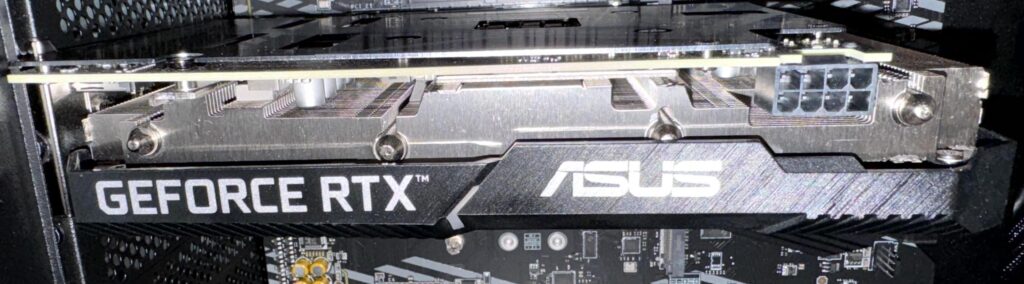
Install the GPU
FPS, FPS and FPS! Now lets install our CPU’s new partner, the GPU. To install the GPU, make sure to install it in the correct PCIex16 slot. In our motherboard it is the slot closest to the CPU.
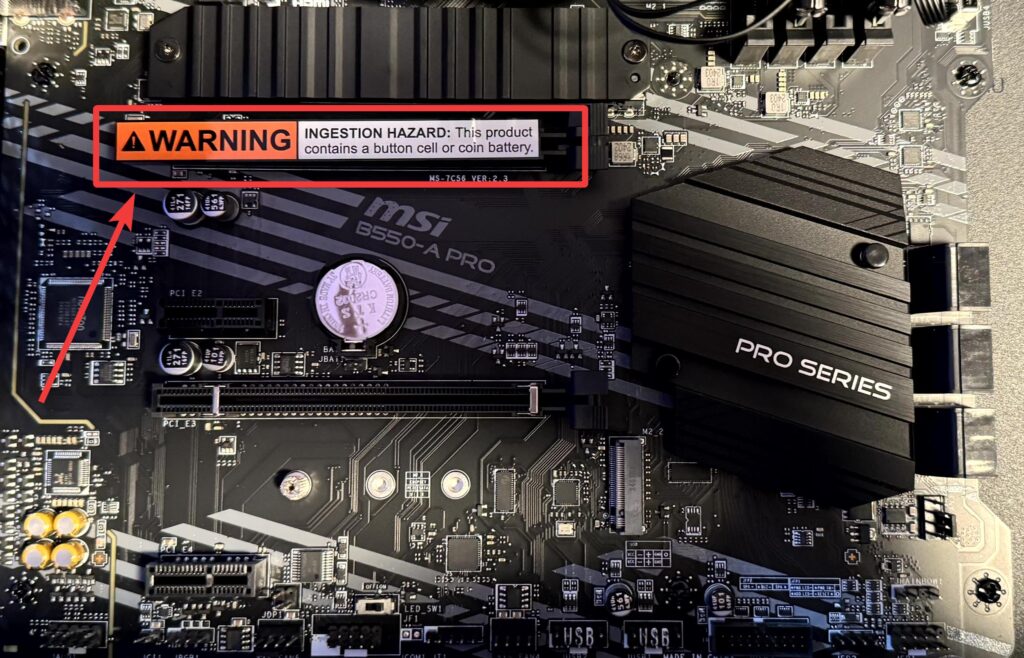
Step 1. Strip off the warning label on the PCIe slot.
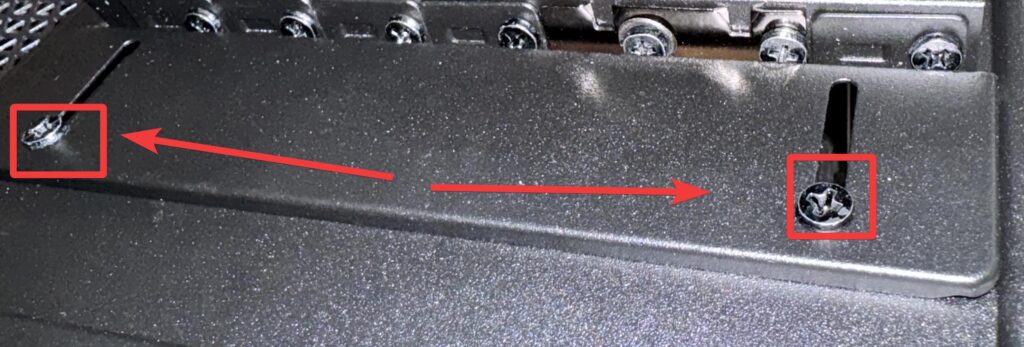
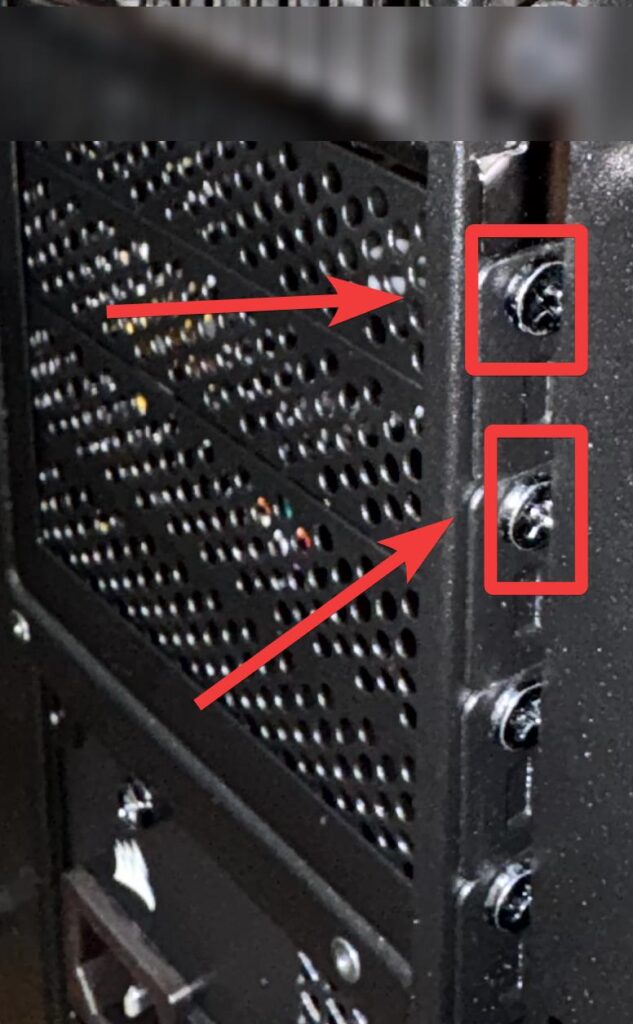
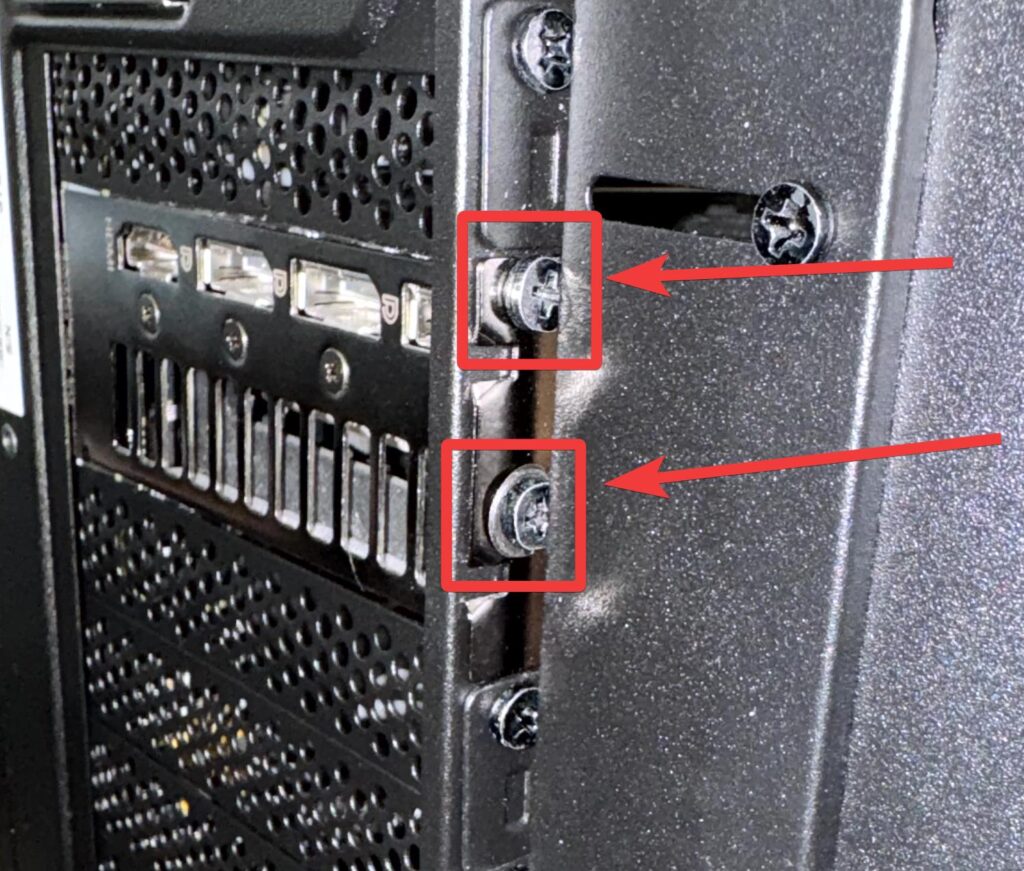
Step 2. Once you located the correct slot, then lets unscrew the I/O holder on the case and it’s shield.
Step 3. Next install the GPU, make sure to align the GPU in the slot. Next lets add some screws to hold the GPU. Finally we will add back the I/O holder.
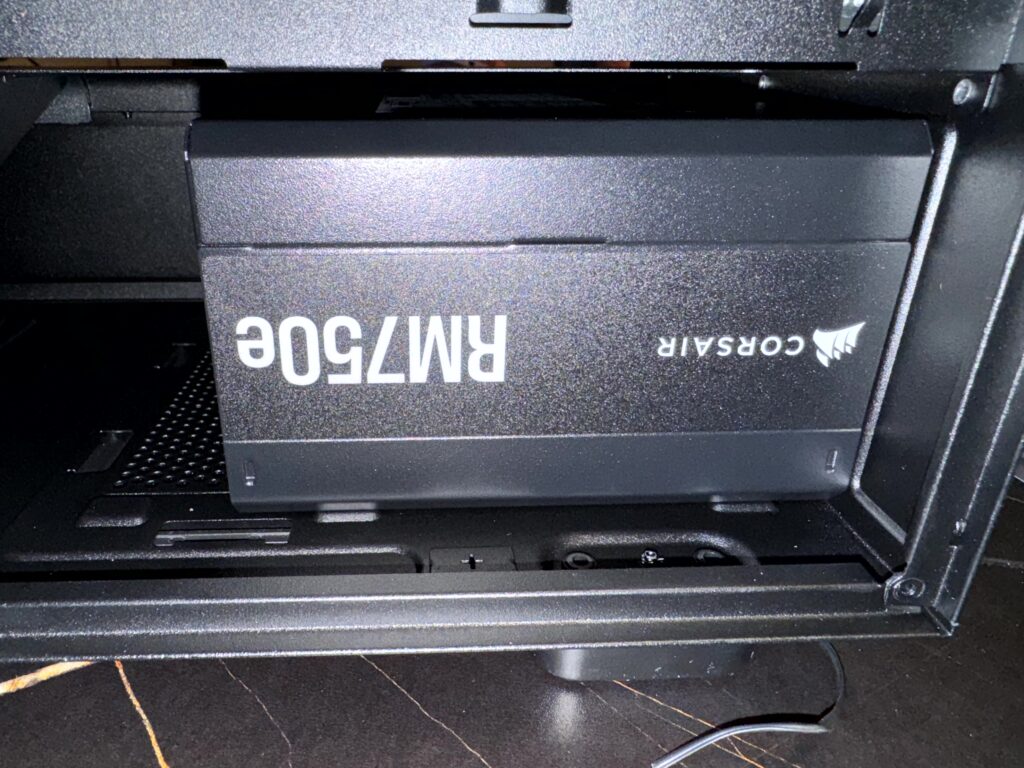
Install the PSU
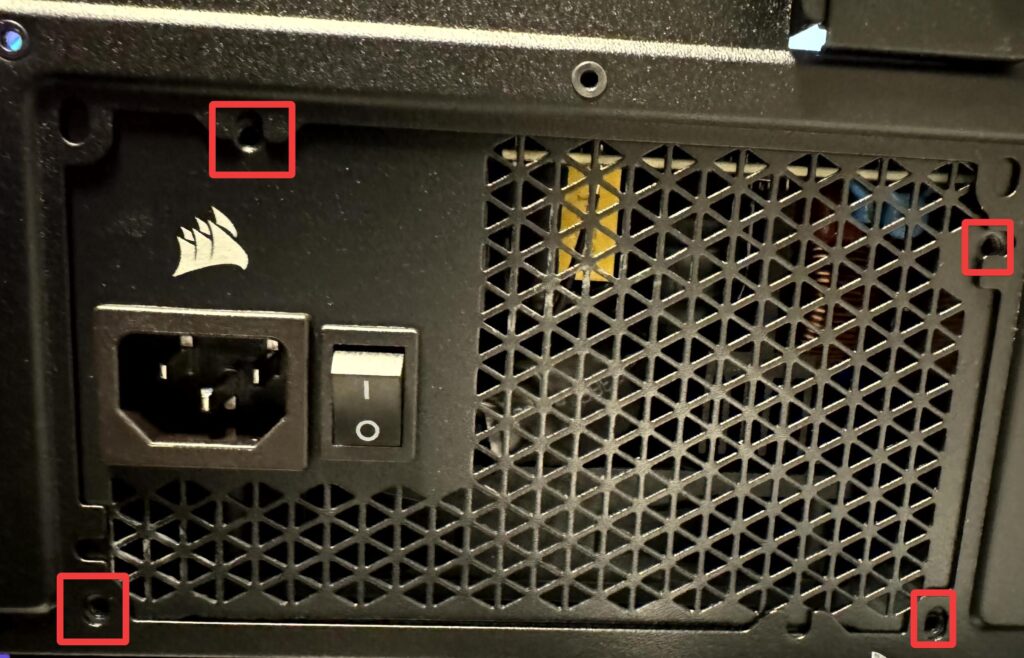
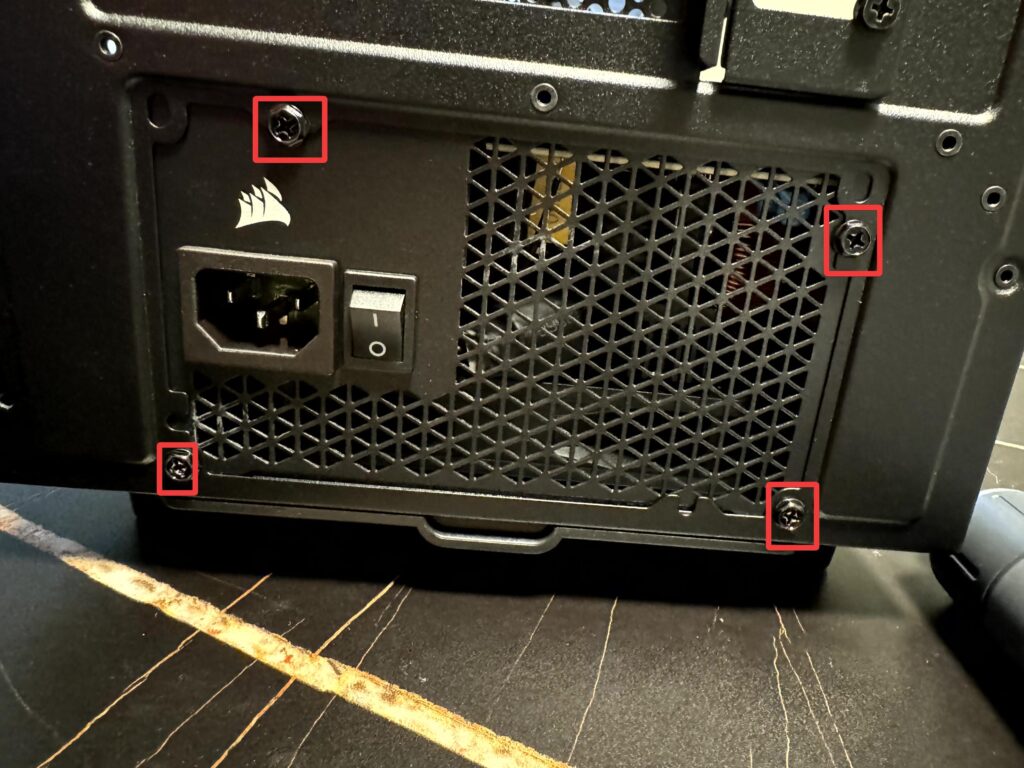
Power level is over 9,000! Well in this case, 750w! The PSU might be one of the most important parts in the PC! The PSU will convert AC electricity to DC electricity. We never want to cheap out on a PSU. Too much risk than gain if you end up getting a cheap PSU. Lets locate the PSU holder on the case. Once located, there are 4 screws we want to screw in to hold the PSU in place.
Step 1. Lets locate the PSU holder on the case.
Step 2. Once located, there are 4 screws we want to screw in to hold the PSU in place.
Plug in all the cables!
Lets start preparing to give life to our motherboard! Next locate the CPU power cable.
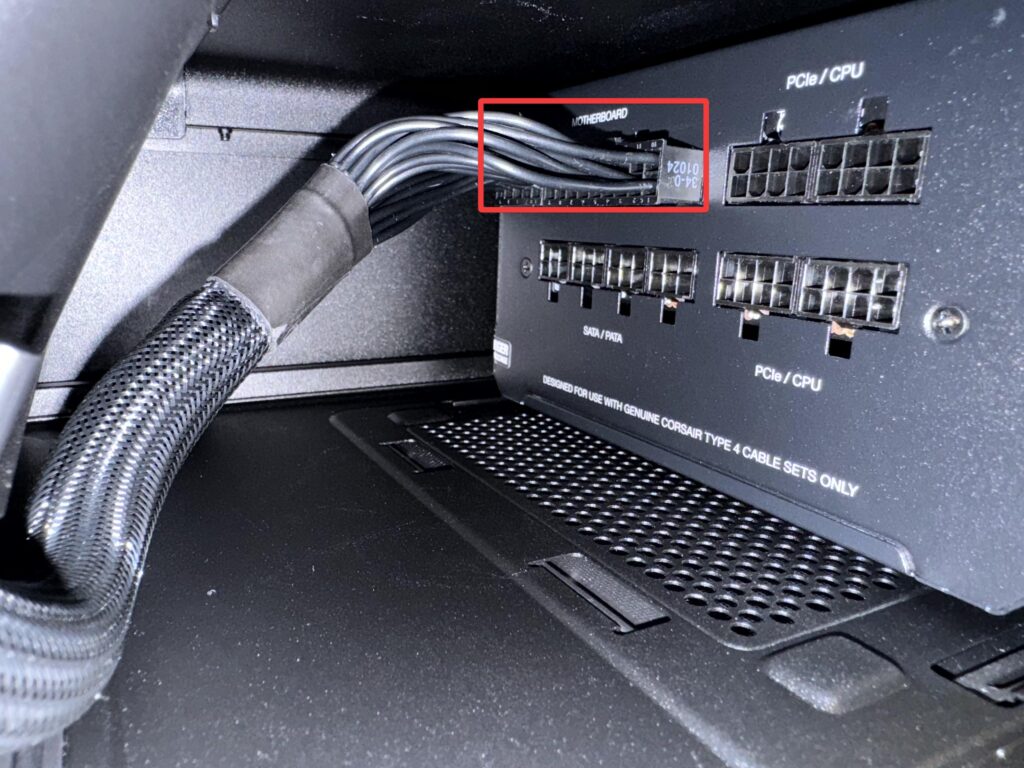
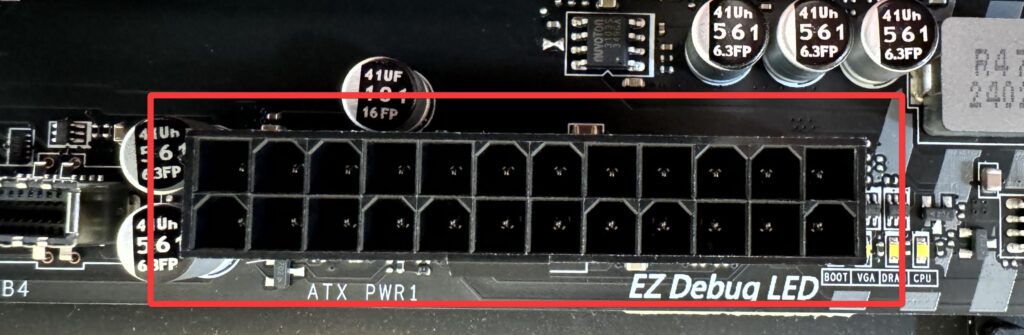
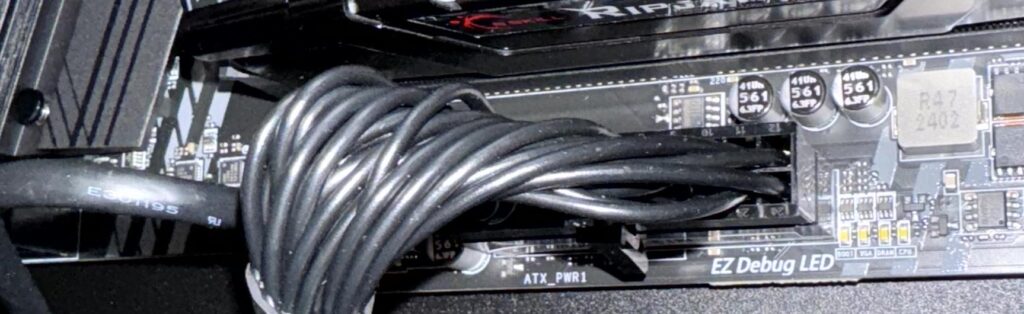
Step 1. On the PSU there should be a slot for motherboard and there should be a 24 pin slot on the motherboard. Grab the motherboard cable, it should be a cable that has a 24 pin connector. Plug the 24 pin connector to the motherboard. Next plug the other end on the PSU motherboard section.
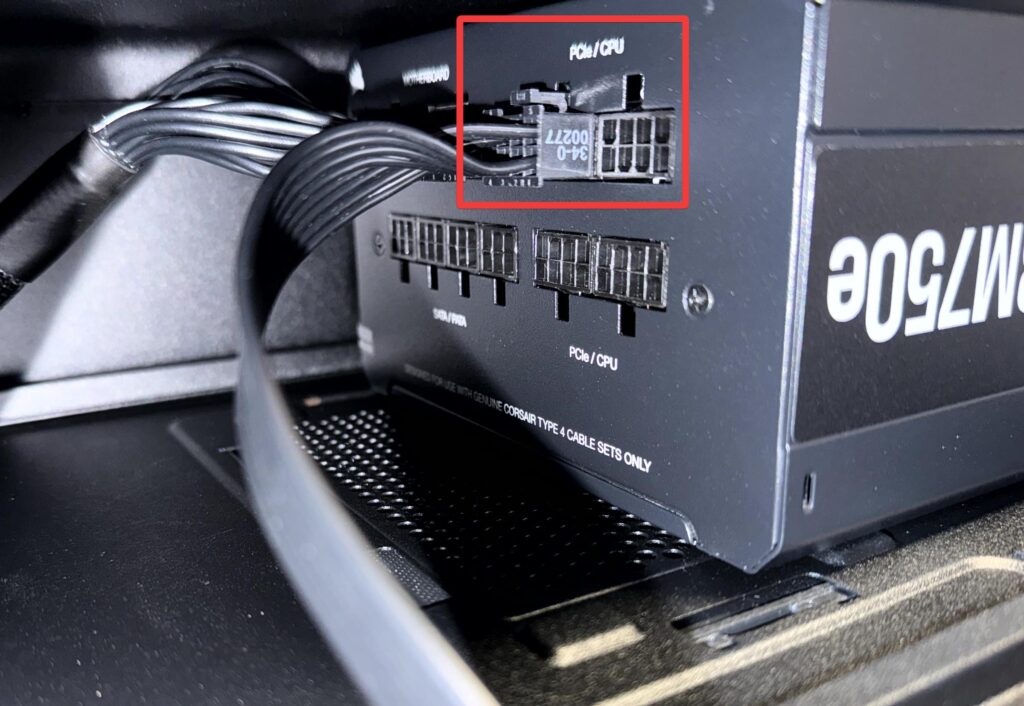
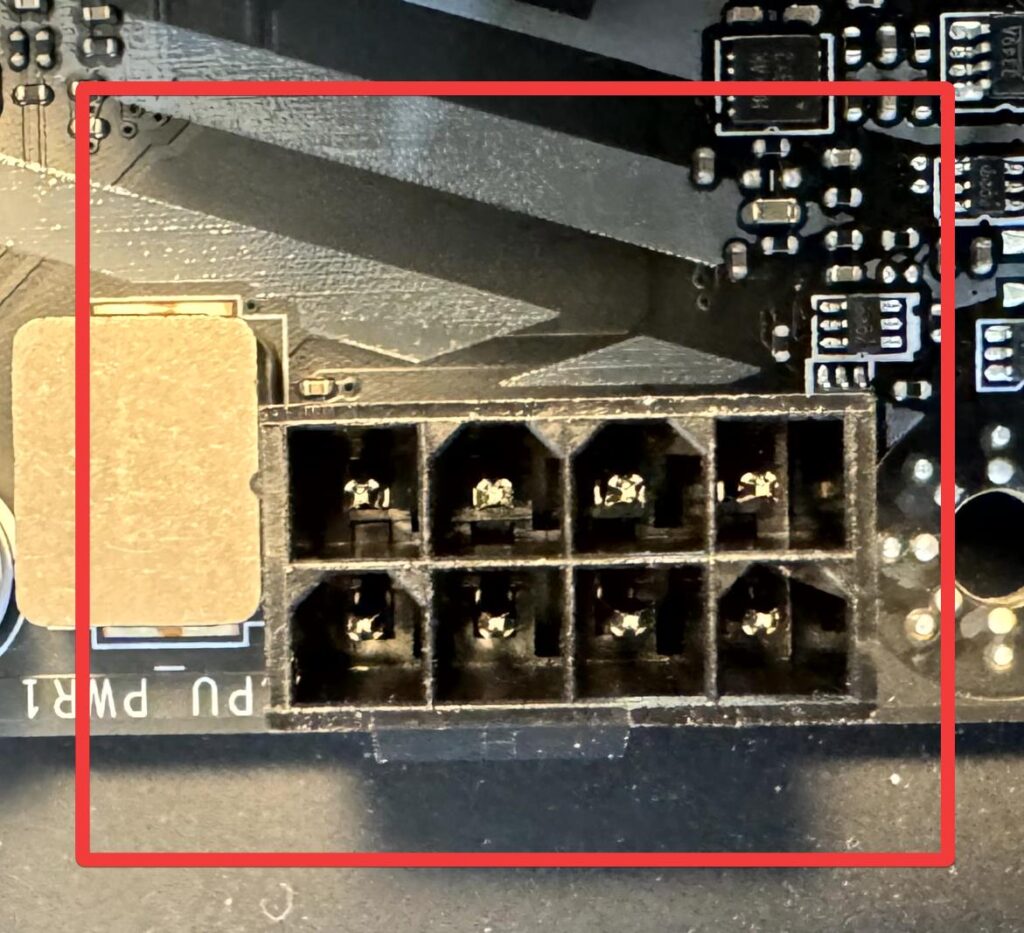
Step 2. Next locate the CPU power cable. Connect one end of the CPU power cable to the CPU 6 pin slot on the motherboard. Next plug the other end on the PSU PCIe/CPU section.

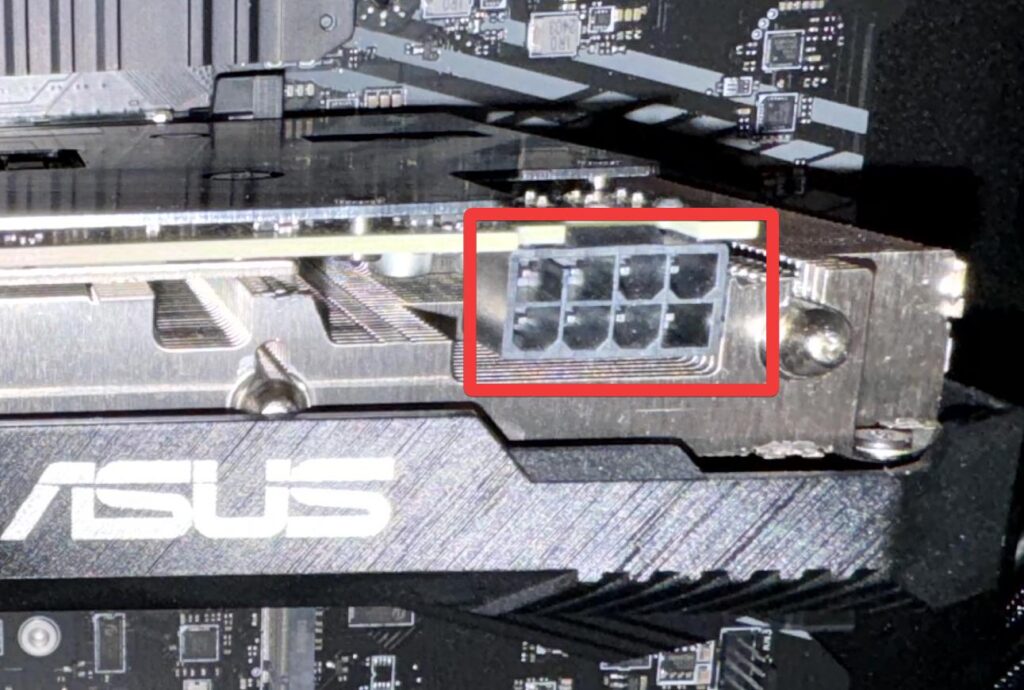
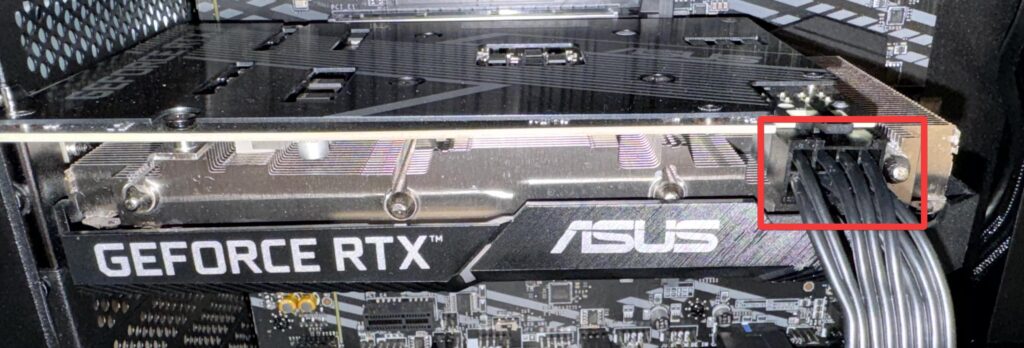
Step 3. After that locate a PCIe cable to give power to the GPU. Connect one end on the GPU. It should be located towards the top of the GPU. Next plug the other end of the cable into the PSU PCIe/CPU section.
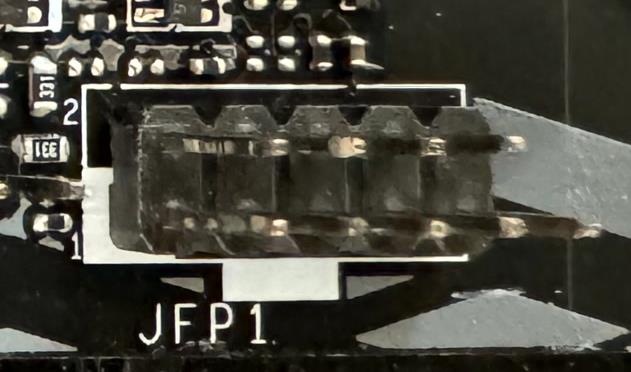
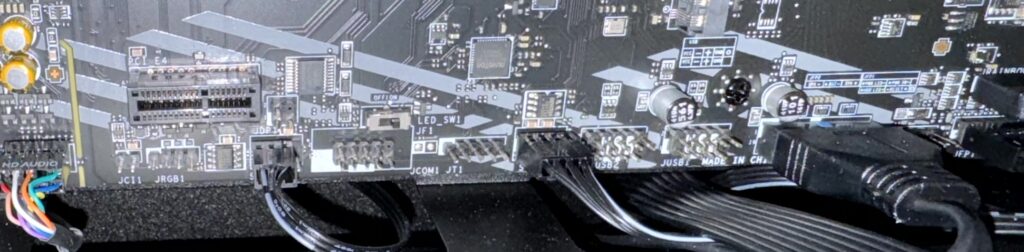
Step 4. Now that we have our beefier components set, lets plug in our Front panel, Fans, and RGB! Take the Front Panel cable and connect it to the motherboard on the JFP1 slot.
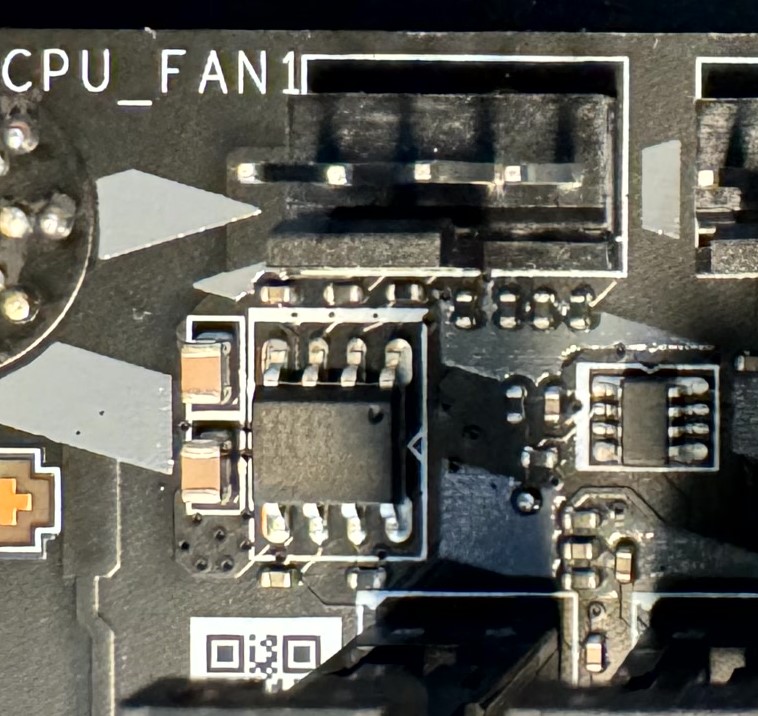
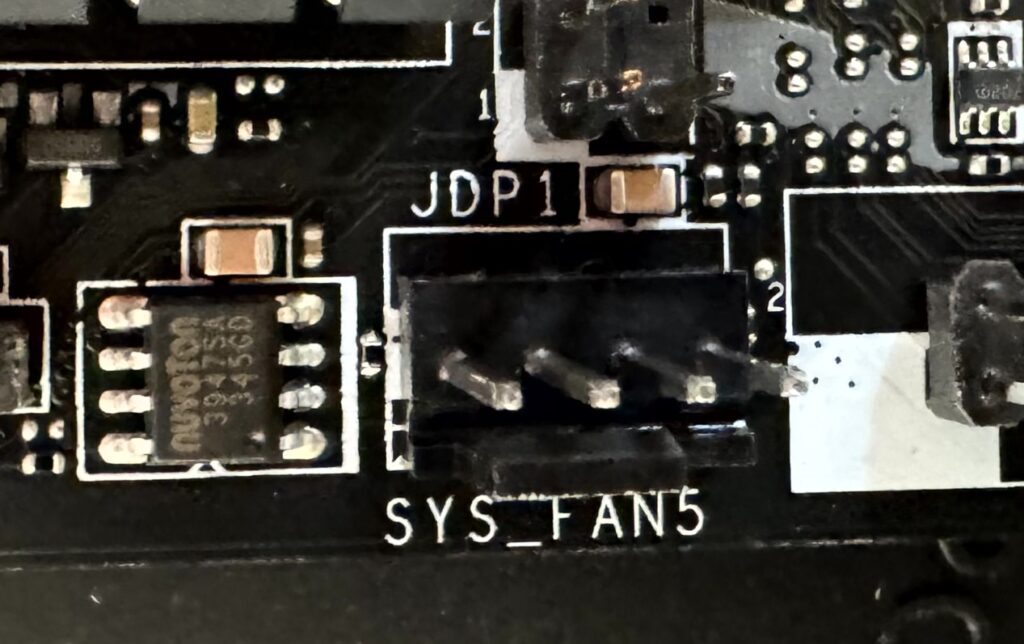
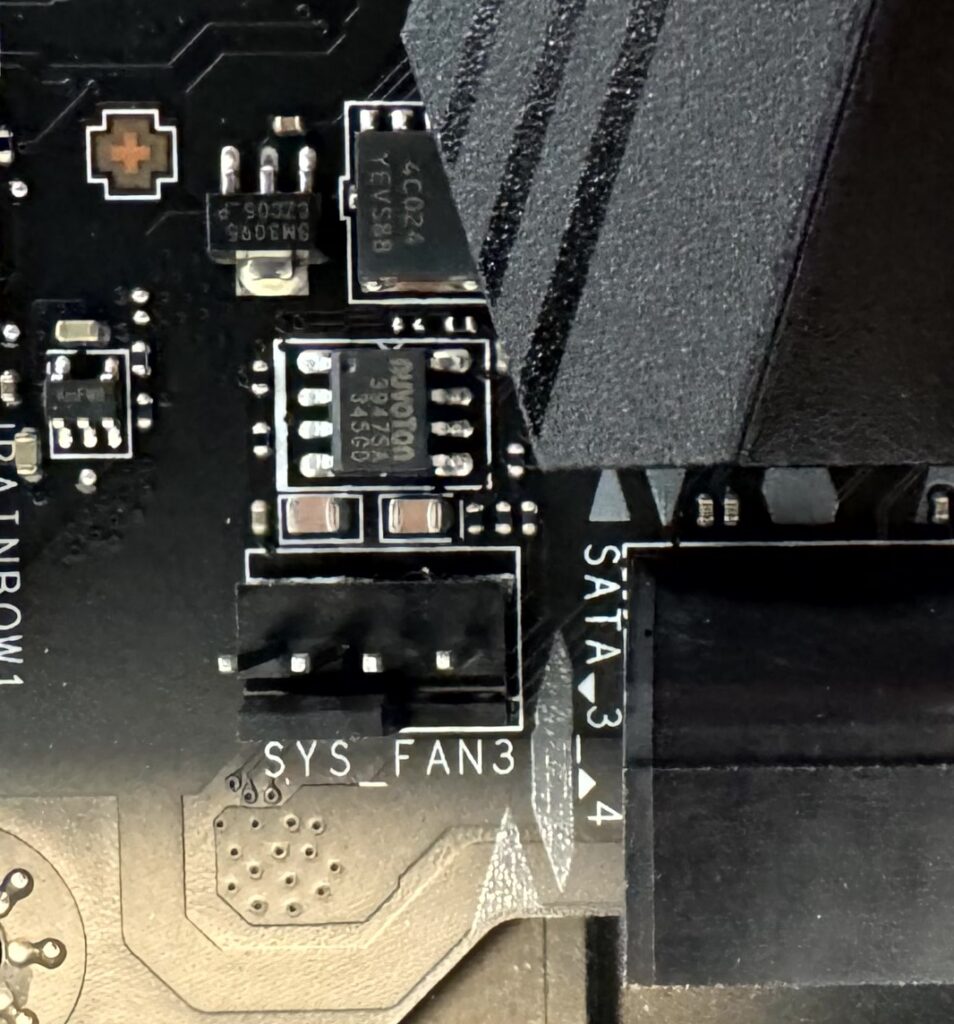
Step 5. Next connect your CPU fan to the CPU fan connector. Then connect your front panel fans to a Sys fan connector.
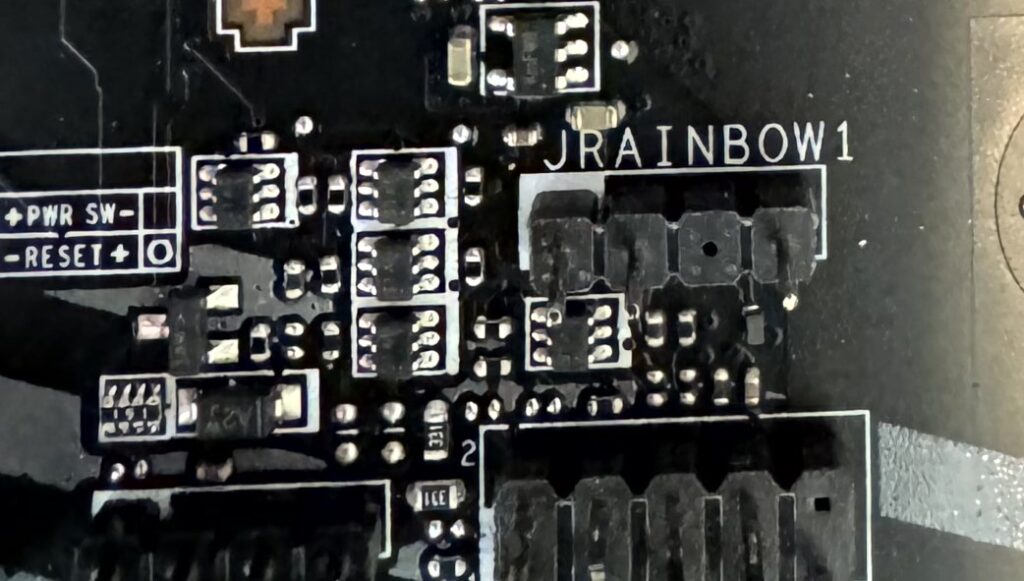
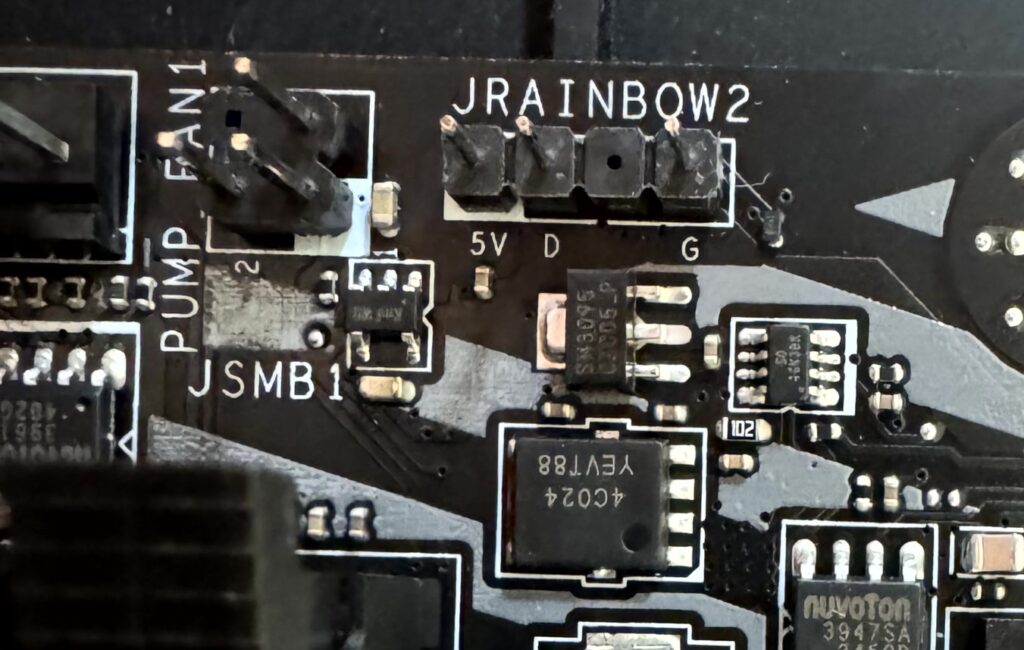
Step 6. Next plug into your CPU fan RGB on the JRAINBOW connector. After that plug in your front panel fan RGB to a JRAINBOW connector.
Step 7. After that plug in your HD Audio cable to the HD audio connector.
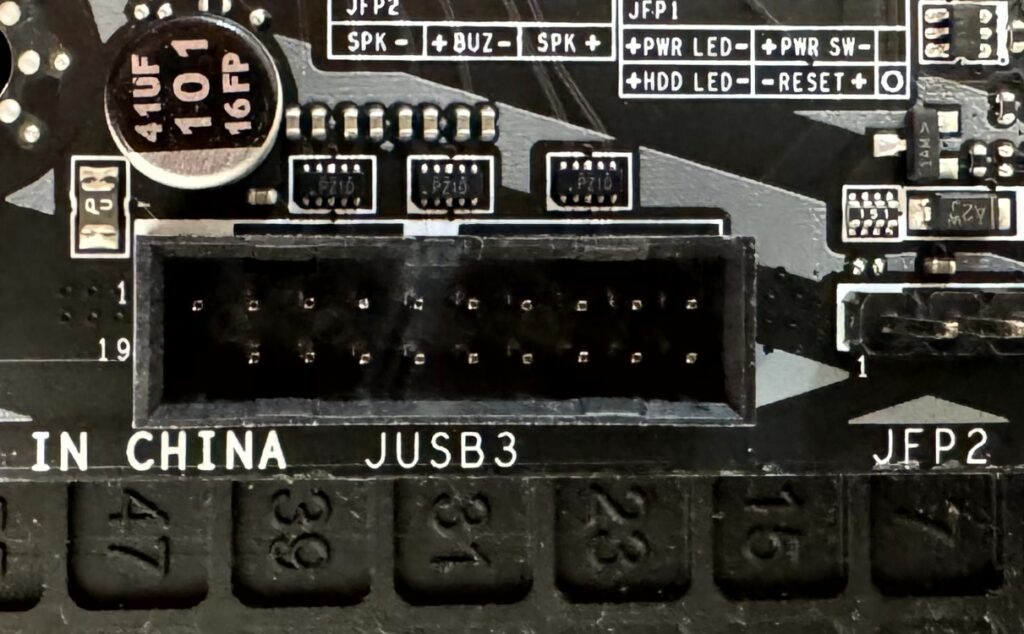
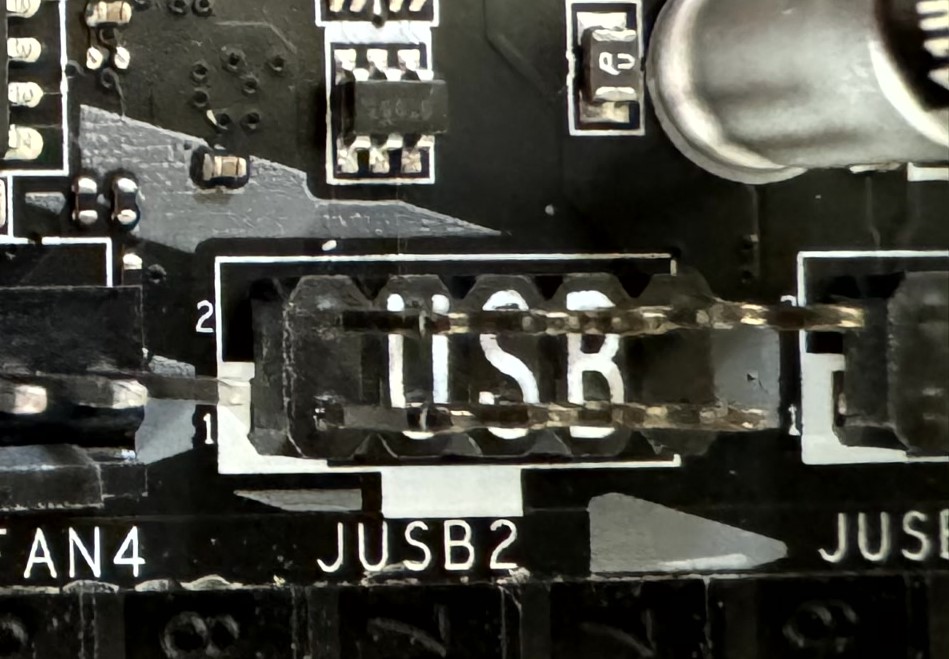
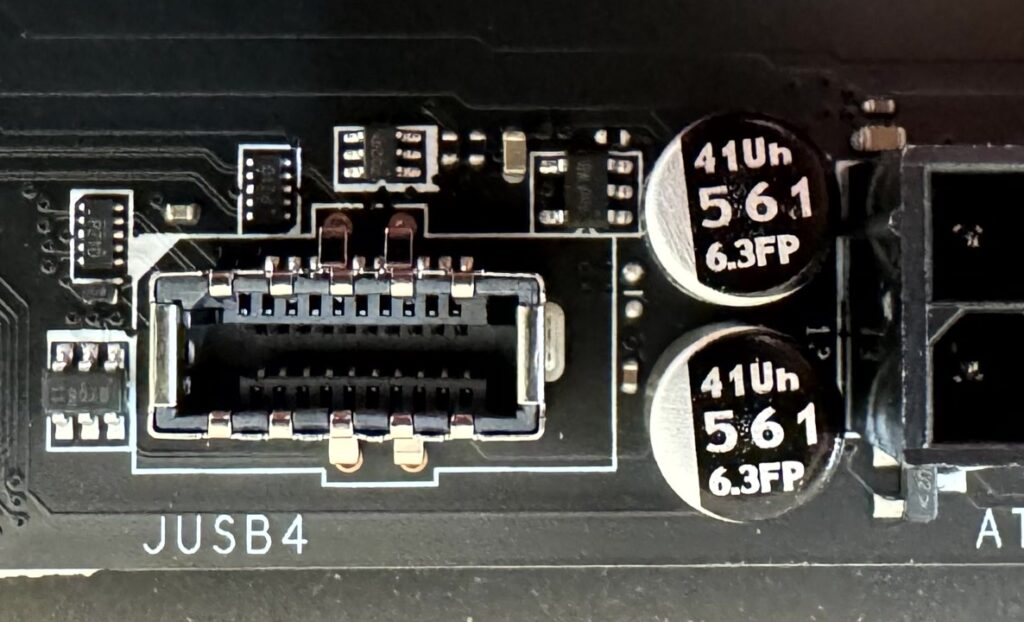
Step 8. Finally plug in the USB connectors! We are done with connecting cables!
Organize your Cables
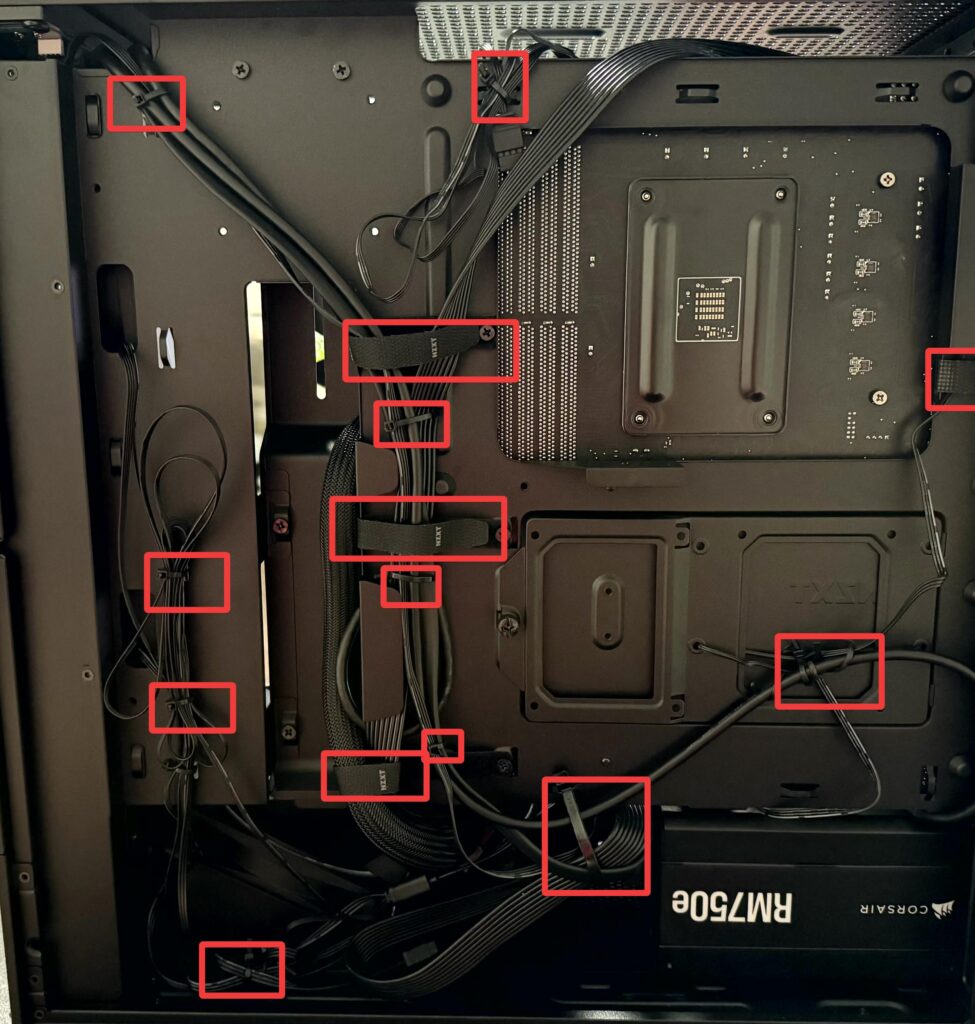
No one looks at the back side of the PC! But we do want to organize it so the user could easily locate where the cables go to if they need to do some changes or upgrades. Zip ties and Velcro will be your best friends! Try to zip tie the cables that are going to the same section on the motherboard. For example, the ones that are being connected towards the bottom of the motherboard, I would zip tie them together. Same goes for the cables that are going towards the top of the motherboard. Also, we want to zip tie our case and fan connectors together to keep them together. You can go the extra mile and use cable sleeves to make the cables look aesthetically organized. Alright seems that we are good to go!
Hoping it POST!
It’s ALIVE!!!! First and foremost lets plug in our PSU to an outlet. Next turn on the switch on the PSU. Make sure the “I” is pushed in. After that lets plug an HDMI/Display cable on the GPU connector and not on the motherboard connector. I repeat, plug your HDMI/Display cable on the GPU connector and not on the motherboard connector! In addition to that make sure your monitor is plugged in! Now for the most exciting moment of this build, push the Power Button on your PC!